- NSMBHD
- Forum index
- Member list
MeroMero
- +1'd posts
|
|
Posted on 07-09-16, 12:19 pm in Misc. patches thread (rev. 4 by
|
|
Death by cuteness
 Karma: 6649 Posts: 458/598 Since: 05-01-13 |
Mini-Mushroom goes through 1/2 tile high and/or wide gaps:
repl_020D1628_ov_0A: @From Block
repl_020D3F0C_ov_0A: @From Item Inventory
AND R1, R5, #0x1F
CMP R1, #0x19
LDREQ R3, =BottomCollision
LDREQ R1, =SideCollision
STREQ R1, [SP]
MOV R1, R4
BX LR
.data
.balign 4
BottomCollision:
.word 0x0
.word 0x0
.word 0x8000
.word 0x0
.word 0x0
.word 0x18000
.balign 4
SideCollision:
.word 0x1
.word 0x1000
.word 0x7000
.word 0x4000 Buzzy Beetles and (Roof) Spinies can't pass through 1/2 tile high gaps: repl_0214F62C_ov_2A:
MOV R1, #1
STR R1, [R0]
MOV R1, #0x2000
STR R1, [R0, #4]
MOV R1, #0xA000
STR R1, [R0, #8]
LDR R1, [R0]
BX LR
repl_0214F358_ov_2A:
MOV R2, #0x6000
BX LR
repl_021775B8_ov_44:
LDR R0, =0x594 @Increase heap for Buzzy Beetle
BX LR
repl_02176574_ov_44:
MOV R5, LR
ADD LR, R4, #0x500
ADD LR, LR, #0x84 @Actor Address for Buzzy Beetle Side Collision
STR LR, [SP]
BX R5
repl_021765B8_ov_44:
MOV R12, #0x6000
STR R12, [R4, #0x590]
LDR R12, =0x2178F98
LDR R6, [R12]
STR R6, [R4, #0x584]
LDR R6, [R12, #4]
STR R6, [R4, #0x588]
LDR R12, [R12, #8]
STR R12, [R4, #0x58C]
BX LR
repl_02176594_ov_44:
MOV R6, #1
STR R6, [R12]
MOV R6, #0x3000
STR R6, [R12, #4]
MOV R6, #0xB000
STR R6, [R12, #8]
LDR R6, [R12]
BX LR
repl_02176B5C_ov_44:
LDR R1, [R4, #0x584]
BIC R1, R1, #0x2700000
STR R1, [R4, #0x584]
BX LR
repl_02176B9C_ov_44:
LDR R2, [R4, #0x584]
ORR R2, R2, #0x2700000
STR R2, [R4, #0x584]
BX LR
repl_02176D58_ov_44:
LDR R1, [R4, #0x584]
BIC R1, R1, #0x2700000
STR R1, [R4, #0x584]
ADD R3, R3, #0x14
BX LR
repl_02176E40_ov_44:
LDR R1, [R4, #0x584]
ORR R1, R1, #0x2400000
STR R1, [R4, #0x584]
ADD R3, R3, #0x14
BX LR
repl_02176E90_ov_44:
LDR R1, [R4, #0x584]
ORR R1, R1, #0x2700000
STR R1, [R4, #0x584]
ADD R3, R3, #0x14
ADD R2, R4, #0x500
ADD R2, R2, #0x64
BX LR
repl_020A919C_ov_00:
LDR R4, [R5, #4]
LDRH R4, [R4, #0xC]
CMP R4, #0x28
BEQ .SuccessSpinyCheck
CMP R4, #0x7B
BNE .BuzzyBeetleCheck
.SuccessSpinyCheck:
LDRB R4, [R2, #0x1B]
CMP R4, #0x10
MOVNE R4, #0x2000
MOVEQ R4, #0x5000
STR R4, [R2, #0x3BC]
ORR R4, R0, #0
BX LR
.BuzzyBeetleCheck:
CMP R4, #0x36
BNE .Return
LDRB R4, [R2, #0x1B]
CMP R4, #0x10
MOVNE R4, #0x3000
MOVEQ R4, #0x5000
STR R4, [R2, #0x338]
.Return:
ORR R4, R0, #0
BX LR Posted by skawo Good work. I'm wondering, if however, one more thing can be done; can the player only be launched upwards if he stays on the platform throughout the entire or most of the "bounce"? Let me see if I got that straight, you basically want to force the player to get on the platform before said platform begin its expansion phase for the player to actually get launched upwards? Not only that but the player will get launched only when the expansion reaches its maximal value? And if one of the conditions fails the player must wait a "turn", or in other words for the next expansion phase? Basically you want me to implement a check to see if Mario was standing on the platform before the expansion phase begins and also a check to see if Mario stayed on the platform for the whole duration of the expansion? If both checks succeeded, Mario gets launched, if one of the checks fails, make the platform act as a normal platform for the remaining of the "turn", correct? |
|
|
Posted on 07-16-16, 08:54 pm in asm Dedicated graphics for all Views within an Area (rev. 5 by
|
|
Death by cuteness
Karma: 6649 Posts: 473/598 Since: 05-01-13 |
Posted by MeroMero I dare say you can (…) even (…) make the game select even a background, foreground, tileset, Soundset, Spriteset per View located in one given Area (but it'll have to be changed dynamically as the game reload the Area)! And I dare say I was right in being stubborn and… Oh, hi! It's me again! Another ASM Hack? Yes, yes, another ASM Hack, but this time this was something that was captivating me for a while: _Could you make the game load custom graphics for each View in a given Area? And now I can say that the answer is YES! Views have their own parameters for ASM-template: @Force the game to reload the Area even when switching Views within the same Area
@Beneficial side effect: prevents a graphical glitch for FG Effects upon View Change within the same Area
repl_0215E4AC_ov_36:
BX LR
nsub_0211963C_ov_0A:
B 0x2119664
@No matter the Area, do NOT nuke Event IDs until Mario exits the level!
repl_0201DEA8:
repl_0201DEAC:
repl_0201DF00:
repl_0201DF04:
repl_0201DF34:
BX LR
@Set Entrance ID to go to
repl_0201E99C:
LDR R12, =0x20CA8FF
LDRB R8, [R4, #0xC] @Get Destination Entrance
STRB R8, [R12] @Set Placeholder Destination Entrance
LDRH R8, [R4, #2]
BX LR
@Set Entrance ID from Warp
repl_021564D0_ov_36:
LDR R1, =0x20CA8FF
LDRB R0, [R5, #0x410]
STRB R0, [R1]
LDRB R0, [R5, #0x410]
BX LR
@Set Entrance ID from Clogged Pipe
repl_021732C0_ov_3B:
LDR R1, =0x20CA8FF
LDRB R0, [R5, #0x4B7]
STRB R0, [R1]
LDRB R0, [R5, #0x4B7]
BX LR
@Set Entrance ID from Event Door
repl_0218CAF8_ov_76:
LDR R1, =0x20CA8FF
AND R4, R5, #0xFF
STRB R4, [R1]
MOV R1, R5, LSR #8
BX LR
@Reload Tileset, Foreground, Background, Sounds Set and Actors Set
repl_0201FB6C:
LDR R0, =0x20CA8FF
LDR R4, =0x208589C
LDR R4, [R4]
CMP R4, #0 @Check if level (not area) is loading
BEQ .LevelAlreadyLoaded @If already loaded jump to next function
MOV R4, #0 @Fetch Start Entrance
LDR R6, =0x2085A30
LDRB R6, [R6] @Get Midway flag
CMP R6, #0xFF
MOVNE R4, #1 @If Midway flag is set, fetch Midway Entrance instead
LDR R1, [R5]
ADD R1, R5, R1
LDRB R6, [R1, R4]
STRB R6, [R0] @Store Entrance ID
.LevelAlreadyLoaded:
LDRB R0, [R0]
ADD R4, R5, #0x28
LDR R1, [R4]
ADD R1, R5, R1 @Get beginning offset
LDR R4, [R4, #4]
ADD R4, R1, R4 @Get end offset
MOV R7, #0 @Set default View Number at 0
.LoopViewNumber:
LDRB R6, [R1, #8] @Get Entrance ID
CMP R6, R0 @Compare Entrance ID with the placeholder Entrance ID
LDREQB R7, [R1, #0x12] @If both IDs match get View Number
BEQ .SuccessViewNumber
ADD R1, R1, #0x14 @Go to next Entrance Data
CMP R1, R4 @Compare current offset to end offset
BCC .LoopViewNumber @Continue looping until end offset becomes the lesser one
.SuccessViewNumber:
MOV R0, #0 @Set counter for LoopLoadFromView
CMP R7, #0 @Compare View Number to 0
BEQ .Return @If true then Return
MOV R1, R5
LDR R6, [R5, #-0xC] @Get filesize
ADD R6, R5, R6 @Get end of file offset
.LoopLoadFromView:
MOV R4, R1
LDR R1, [R4, #0x68]
ADD R1, R5, R1
ADD R1, R1, #0x10
CMP R1, R6
BCS .Return @If greater or equal then Return, this will consider the default View Number
ADD R0, R0, #1
CMP R0, R7 @Compare counter to View Number
BCC .LoopLoadFromView @Exit the loop if greater or equal (most likely equal)
MOV R4, R5
MOV R6, #0
.LoopWriteForView:
LDR R0, [R1], #4 @Fetch offsets and sizes for each of the 14 blocks for selected View Number
STR R0, [R4], #4 @Write them to the beginning of the file, where they are supposed to be read
ADD R6, R6, #1
CMP R6, #0x1C @14 blocks, 8 bytes, maximum of 4 bytes per register
BCC .LoopWriteForView @Hence why the loop is broken at 28 and not 14
.Return:
LDR R4, =0x208B168 @Default instruction that was replaced to allow this mod
BX LR
@Reload Music if necessary
repl_0201E790:
ADD LR, LR, #0xC
BIC R1, R1, #0x80
LDR R0, [SP]
CMP R0, #0
BLT .GetView
CMP R0, #4
BGE .GetView
LDR R2, =0x2085A3C
LDR R2, [R2]
CMP R0, R2
BEQ .GetView
CMP R1, #0x70
BXCC LR
.GetView:
STMFD SP!, {R3-R4}
LDR R4, =0x20CA8FF
LDRB R4, [R4]
LDR R0, =0x2086A2C
LDR R0, [R0]
LDR R2, [R0, #0x28]
ADD R2, R0, R2
LDR R3, [R0, #0x2C]
ADD R3, R2, R3
.LoopGetView:
LDRB R0, [R2, #0x8]
CMP R0, R4
BEQ .OutLoopGetView
ADD R2, R2, #0x14
CMP R2, R3
BCC .LoopGetView
.OutLoopGetView:
LDRB R0, [R2, #0x12] @Get View Number
LDR R4, =0x2086A2C
LDR R4, [R4]
LDR R3, [R4, #0x38]
ADD R3, R4, R3
LDR R4, [R4, #0x3C]
ADD R4, R4, R3
.LoopGetView2:
LDRB R2, [R3, #0x8]
CMP R2, R0
BEQ .OutLoopGetView2
ADD R3, R3, #0x10
CMP R3, R4
BCC .LoopGetView2
.OutLoopGetView2:
LDRB R1, [R3, #0xA]
BIC R1, R1, #0x80
LDMFD SP!, {R3-R4}
BX LR Now onto the second part. To take full advantage of this hack, you will need to mess with the files in the course folder (the ones with 14 blocks of data, not the bgdat ones) First, I'll remind you of how those files are laid out: _info data _block 1 _block 2 _block 3 _… _block 13 _block 14 The info data is where are stored the offsets and the sizes for all 14 blocks (8 bytes per block) So for example if I wanted to know where to read block 5, I first need the info data for block 5. To calculate it, I need this formula: (B-1)*8 Where B is the Block Number, so: (5-1)*8 = 4*8 = 32 To read the info data for block 5, I need to go to offset 32 (0x20), and I read this: 00 01 00 00 14 00 00 00 ?? So the offset is 4 bytes in size, the same goes for the block size: Offset: 00 01 00 00 Size: 14 00 00 00 ?? Let's invert the reading: Offset: 00 00 01 00 Size: 00 00 00 14 Much better, so this means that block 5 begins at offset 0x100 and is 20 (0x14) bytes long! But what does this have to do with this ASM Hack? This is where I spice up the difficulty! Remember the original layout? This is what you'll need to do: _Info Data for View 0 _Block 1 _Block 2 _… _Block 14 _Info Data for View 1 _Block 1 _Blocks 3 to 5 _Block 14 _Info Data for View 2 _Block 1 _Blocks 3 to 5 _Block 14 etc. Basically for each additional View, the layout is: _Info Data for View non 0 _Block 1 _Block 3 _Block 4 _Block 5 _Block 14 But why only those 5 Blocks? _Block 1 allows you to change the Tileset, FG and BG .ncg as well as the Sounds Set _Block 3 allows you to change the BG .nsc and .ncl respectively _Block 4 allows you to change the Tileset .ncl _Block 5 allows you to change the FG .nsc and .ncl respectively _Block 14 allows you to change the Actors Sets As an example you can download this level: Level 2-3 Area 1.nml If you go look at the file B03_1.bin in the course folder, what I said earlier will start to make more sense, especially how the Info Data for additional Blocks is set. Q: What if I only have 1 Block Set for all Views? A: No problem, the game will work as it normally would, no graphical glitch or anything. Q: Can you run this ASM Hack alongside the Dedicated graphics per Area Hack? A: Yes you can, but keep in mind that only Sound Sets and Actor Sets will truly have an effect since the Tileset, FG and BG will get superseded anyways by the Dedicated graphics code! Q: Does this work on the real deal? A: Of course it works on a NDS! |
|
|
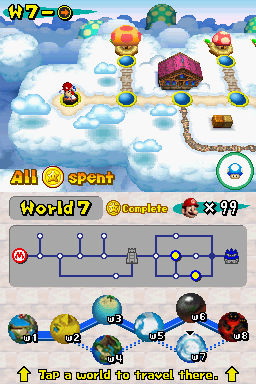
Posted on 07-21-16, 02:45 pm in asm Worldmap icons with 256 colors each (rev. 5 by
|
|
Death by cuteness
Karma: 6649 Posts: 478/598 Since: 05-01-13 |
Map icons with 256 colors each: @Sub Sprite Ext Palette can only be mapped into Bank I
@But Bank I already hosts Sub Sprite
@Change this!
repl_020CFD08_ov_08:
MOV R0, #1 @Force Main BG to be mapped into Bank A
BX LR
repl_020CFD38_ov_08:
MOV R0, #8 @Force Sub Sprite to be mapped into Bank D
BX LR
repl_020CFD40_ov_08:
STMFD SP!, {LR}
MOV R0, #0x100
BL .SetBankForSubOBJExtPal
LDR R1, =0x2085B18
LDMFD SP!, {PC}
@repl_020BD2A0_ov_00:
@ LDMFD SP!, {R4, PC} @Exit the Map-icons function earlier as to not write the palette at address 0x5000600
repl_020D0194_ov_08:
STMFD SP!, {LR}
BL 0x20099C8
MOV R0, #0x780
MOV R1, #0
MOV R2, R1
BL .PrepareSubOBJExtPal
LDMFD SP!, {PC}
.PrepareSubOBJExtPal:
STMFD SP!, {R4-R6, LR}
MOV R6, R1
CMP R2, #0
BEQ .LoadFileByExtId
BL 0x200869C
MOV R5, R0
B .Begin
.LoadFileByExtId:
BL 0x20087F0
MOV R5, R0
.Begin:
CMP R5, #0
LDMEQFD SP!, {R4-R6, PC}
LDR R0, =0x208B72C
MOV R1, R5
LDR R0, [R0]
BL 0x2044CC8
MOV R4, R0
BL .BeginLoadSubOBJExtPal
MOV R0, R5
MOV R1, R6
MOV R2, R4
BL .LoadSubOBJExtPal
BL .EndLoadSubOBJExtPal
MOV R0, R5
BL 0x20087C0
LDMFD SP!, {R4-R6, PC}
repl_020CDD9C_ov_09:
LDR R0, =0x216E72C
ADD R0, R0, #1
MOV R2, #0
.LoopPaletteMode:
LDRB R1, [R0]
ANDS R1, R1, #0x20
LDREQB R1, [R0]
ADDEQ R1, R1, #0x20
STREQB R1, [R0], #8
ADD R2, R2, #1
CMP R2, #0x69
BCC .LoopPaletteMode
LDMFD SP!, {PC}
repl_020CDD8C_ov_09:
LDR R0, =0x216E730
LDRH R1, [R0]
LDR R2, =0x3FF
AND R1, R1, R2
CMP R1, #0x48
BNE .Return
MOV R1, #0
.LoopTileNumber:
LDRH R2, [R0]
STMFD SP!, {R1}
MOV R1, R2, LSL #0x16
MOV R1, R1, LSR #0x15
AND R2, R2, #0xC00
ADD R2, R2, R1
LDMFD SP!, {R1}
STRH R2, [R0], #8
ADD R1, R1, #1
CMP R1, #0x69
BCC .LoopTileNumber
.Return:
LDR R0, =0x778
MOV R1, #0
BX LR
repl_020D0D58_ov_08:
MOV R0, #0xF7 @Common coefficient for un-greying map-icons
STR R0, [SP, #0x1C]
STR R0, [SP, #0x20]
STR R0, [SP, #0x24]
STR R0, [SP, #0x28]
BX LR
repl_020D0E88_ov_08:
repl_020D0E90_ov_08:
repl_020D0E98_ov_08:
repl_020D0EA0_ov_08:
LDR R2, [SP, #0x1C]
ADD R2, R2, R8 @Add World number (R8) to map-icon coefficient (R2)
BX LR
repl_020D0F08_ov_08:
MOV R7, #0xF7 @Coefficient for un-greying roads
BX LR
repl_020CF6C4_ov_08:
MOV R3, #9 @Change Palette for Nodes not affected by Challenge Mode
BX LR
.SetBankForSubOBJExtPal:
STMFD SP!, {LR}
SUB SP, SP, #4
LDR R1, =0x2094248
MVN R12, R0
LDRH R2, [R1, #0x18]
LDRH R3, [R1]
CMP R0, #0
STRH R0, [R1, #0x18]
ORR R2, R3, R2
AND R2, R12, R2
STRH R2, [R1]
BEQ .AlternateMethod
CMP R0, #0x100
BNE .VRAMCountLCDC
LDR R3, =0x4001000
LDR R0, =0x4000249
LDR R2, [R3]
MOV R1, #0x83
ORR R2, R2, #0x80000000
STR R2, [R3] @Enable Sub Sprite Ext Palette by setting [B]DISPCNT bit 31 at 1
STRB R1, [R0] @Set Bank I (0x4000249) as Sub Sprite Ext Palette (0x83)
B .VRAMCountLCDC
.AlternateMethod:
LDR R1, =0x4001000
LDR R0, [R1]
BIC R0, R0, #0x80000000
STR R0, [R1] @Disable Sub Sprite Ext Palette by setting [B]DISPCNT bit 31 at 0
.VRAMCountLCDC:
LDR R0, =0x2094248
LDRH R0, [R0]
BL 0x2061D7C
ADD SP, SP, #4
LDMFD SP!, {LR}
BX LR
.BeginLoadSubOBJExtPal:
STMFD SP!, {LR}
SUB SP, SP, #4
BL 0x2061164
LDR R1, =VariableSubOBJExtPal
STR R0, [R1]
ADD SP, SP, #4
LDMFD SP!, {LR}
BX LR
.LoadSubOBJExtPal:
STMFD SP!, {R4-R5, LR}
SUB SP, SP, #0xC
LDR R3, =0x2085714
MVN R12, #0
LDR LR, [R3]
MOV R5, R0
MOV R4, R1
MOV R3, R2
CMP LR, R12
BEQ .AlternateMethod2
LDR R2, =0x68A0000
MOV R12, #0
STR R12, [SP, #0]
MOV R0, LR
MOV R1, R5
ADD R2, R4, R2
STR R12, [SP, #4]
BL 0x2066A60
ADD SP, SP, #0xC
LDMFD SP!, {R4-R5, LR}
BX LR
.AlternateMethod2:
LDR R1, =0x68A0000
ADD R1, R4, R1
BL 0x2066EAC
ADD SP, SP, #0xC
LDMFD SP!, {R4-R5, LR}
BX LR
.EndLoadSubOBJExtPal:
STMFD SP!, {LR}
SUB SP, SP, #4
LDR R0, =0x2085714
MVN R1, #0
LDR R0, [R0]
CMP R0, R1
BEQ .AfterDMA
BL 0x1FFA358
.AfterDMA:
LDR R0, =VariableSubOBJExtPal
LDR R0, [R0]
BL .SetBankForSubOBJExtPal
LDR R0, =VariableSubOBJExtPal
MOV R1, #0
STR R1, [R0]
ADD SP, SP, #4
LDMFD SP!, {LR}
BX LR
.data
.balign 4
VariableSubOBJExtPal:
.word 0x0 You will need the 3 files below (more so the 3rd one) to put in the uiStudio folder: UI_O_1P_course_select_o_ud_ncl.bin UI_O_1P_course_select_u_ncg.bin UI_O_1P_course_select_d.nce.bncd The first is the 4096 colors-palette that will replace UI_O_1P_course_select_o_ud_ncl.bin The second is the worldmap graphics used for the top screen that will replace UI_O_1P_course_select_u_ncg.bin The third is the bncd file with all of its images upgaded to 8bpp mode that will replace UI_O_1P_course_select_d.nce.bncd Palette 0 normally should have only 90 colors, but due to an earlier fail of mine, well it has 255 colors instead, but the basic idea stays the same: _Palette 0 is for UI_O_1P_course_select_u.ncg.bin as well as the vast majority of the icons contained in the bncd. _Palette 1 to 8 is for the World-map icons, in the same order _Palette 9 is for the roads that are not unlocked yet, as well as for nodes/levels ignoring Challenge Mode _Palette 10 is for all the worlds that are not unlocked yet _Palette 11 to 15 are copies of the 4 main palettes The bncd is a must! Especially considering that not only were the OAM properties changed, but also all the textures were doubled in size! Download this modified version of NSMBe to easily import your 8bpp icons: nsmb-editor-380b.zip Now you can enjoy your new map-icons with 256 colors  Works on a NDS! |
|
|
Posted on 08-30-16, 10:51 pm in asm Sprite 93 always available and on higher layer priority
|
|
Death by cuteness
Karma: 6649 Posts: 569/598 Since: 05-01-13 |
With this ASM Hack, not only can you use Sprite 93 regardless of the Sprite Set, but now you can also use Pipes and Signboards in front of tiles, in other words give them a higher layer priority.
Since this hack need a NSMB ROM with new files, you have to go there to download the hack: http://nsmbhd.net/post/49237/ If you still want to get this on a already modified ROM, then you will need to patch a NSMB (U) ROM with one of the 2 patches in the archive and then extract the whole folder called yajirusi, the last one in the enemy folder. After you've done the above, follow this tutorial to add files in your hacked ROM: http://nsmbhd.net/thread/3253-adding-files-to-the-rom-tutorial/ Then go in the ASMTemplate folder, and open the folder bak (if it exists). If it exists, then look for the file main.bin, and if it exists open it with an Hex editor and paste this at offset 0x19C0: and at offset 0x39AB0 change EC 21 13 02 into 1C 20 00 02. If either of the bak folder or the main.bin file doesn't exist, then in NSMBeditor Decompress arm9, extract it, open it with a Hex editor and do the 2 replacements at the offsets mentioned above, after you're done import back the arm9. Again in the bak folder (assuming it exists) look for the file 0.bin, and if it exists open it with an Hex editor and at offset 0x2C9EA replace 0F 01 into 00 00. If either of the bak folder or the 0.bin file doesn't exist, then in NSMBeditor Decompress overlay 9_0, open it with the NSMBe Hex editor and do the replacements at the offset mentioned above. Now you can insert the 2 following ASM Hacks. Signboard upgrade: repl_02001D9C:
MOV R1, R0, LSR #0x14
AND R1, R1, #0x1F
ANDS R0, R0, #0x10000000
LDR R0, =0x105E @First file in yajirusi folder
BNE .Pipes
AND R1, R1, #0xF
CMP R1, #0xA
ADDCC R0, R1, R0
ADDCC R0, R0, #0x21
B .Return
.Pipes:
ADD R0, R1, R0
ADD R0, R0, #1
.Return:
ADD LR, LR, #0x34
BX LR
repl_02001F28:
LDR R0, =PseudoStack
STR R5, [R0]
STR LR, [R0, #4]
MOV R5, #0
.LoopModels:
LDR R0, =0x105E
ADD R0, R0, R5
MOV R1, #0
BL 0x2009C64
ADD R5, R5, #1
CMP R5, #0x2B
BCC .LoopModels
LDR R5, =PseudoStack
LDR LR, [R5, #4]
LDR R5, [R5]
ADD LR, LR, #0x14
BX LR
repl_02001D04:
MOV R0, #0x800 @Small is 8x8 instead of 9x9
BX LR
repl_02001D2C:
MOV R0, #0x1000 @Normal is 16x16 instead of 18x18
BX LR
.data
.balign 4
PseudoStack:
.word 0x0
.word 0x0 You will also need this Hack to prevent Actor 77 from dying upon level completion: http://nsmbhd.net/post/51328/ The editor was optimized specifically to help level designers handle Sprite 93: Be careful about Shift X and Shift Y, those are the values you want to use: Normal size: Nybble9: D => 8 pixels left Nybble10: E => 8 pixels down Small size: Nybble9: 1 => 4 pixels left Nybble9: 2 => 4 pixels right Nybble9: 3 => 8 pixels left Nybble10: 1 => 4 pixels down Nybble10: 2 => 8 pixels down Nybble10: 3 => 12 pixels down All those specific cases will move the sprite in the Level Editor so you know what to expect. Last but not least know that Sprite 93 has no collision, so if you want to enter the Pipes, you will have to create new objects in the Tileset 1 you're using that match the behavior of the Pipes' directions and place said objects directly behind the Pipes. |
|
|
Posted on 10-25-14, 01:55 pm in How to use Output/Input event AND/OR/IF type things?
|
|
Death by cuteness
Karma: 6649 Posts: 136/598 Since: 05-01-13 |
Posted by mario1luigi9 . Most constructive post ever, no really I mean it, this is the single best post in NSMBHD hands down. So good that I could tell just by looking at that single dot what rubbed you the wrong way with my arguably miserable attempt at helping you. |
|
|
Posted on 11-03-14, 04:54 pm in Tileset List
|
|
Death by cuteness
Karma: 6649 Posts: 145/598 Since: 05-01-13 |
  Dark vertical lines were lightened. Suddenly I wanted to see how the tileset would look with brownish/autumnal grass instead. In-game 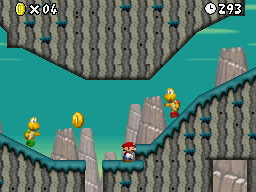 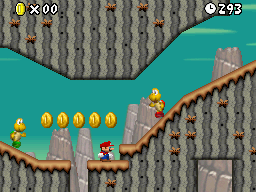 Which version is the most visually appealing ? Personally I prefer the brown grass variant. |
|
|
Posted on 11-04-14, 07:36 pm in tutorial Add tiles to Jyotyu ncg
|
|
Death by cuteness
Karma: 6649 Posts: 148/598 Since: 05-01-13 |
How to edit/add tiles to the Jyotyu tileset without breaking the colors.
Step 1: As an example we're going to add the NSMBWii Arrows.  You should make the picture 256×48 pixels from the get-go.  Step 2: We're going to replace one of the 4 jyotyu ncl. You should choose the ncl that has the least chance of giving an error because of repeated colors. This time we're going to use the jyotyu_B. 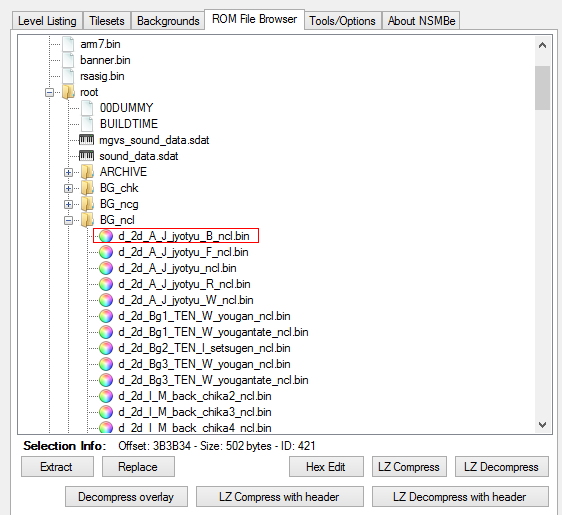 Step 3: Extract the ncl, you'll need the backup because we're going to re-insert it later. Replace the ncl with this one: d_2d_A_J_jyotyu_B_ncl(1121).bin What is this ? Basically it gives the second palette 256 unique colors (we're going to name it the Super Palette  ), this is going to be the key to prevent any mistake when you want to import your image. ), this is going to be the key to prevent any mistake when you want to import your image.Step 4: Extract the image colored with the Super Palette by clicking "Export this bitmap", again you're going to need it. 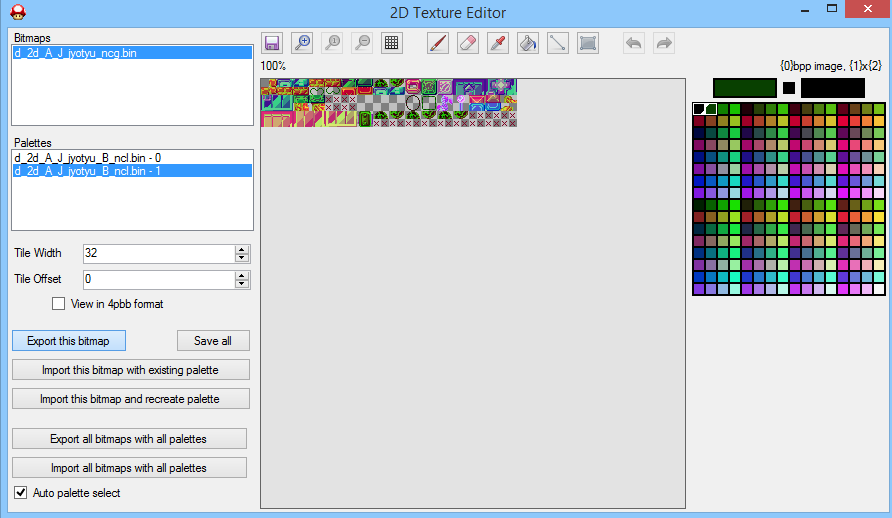 Step 5: Now choose which palette to use with the NSMBWii Arrows, for this tutorial we're going to use the palette 0 (if you want to import on palette 1, Super Palette should be palette 0 then). Step 6: Switch to your Super Palette and click "Export this bitmap". 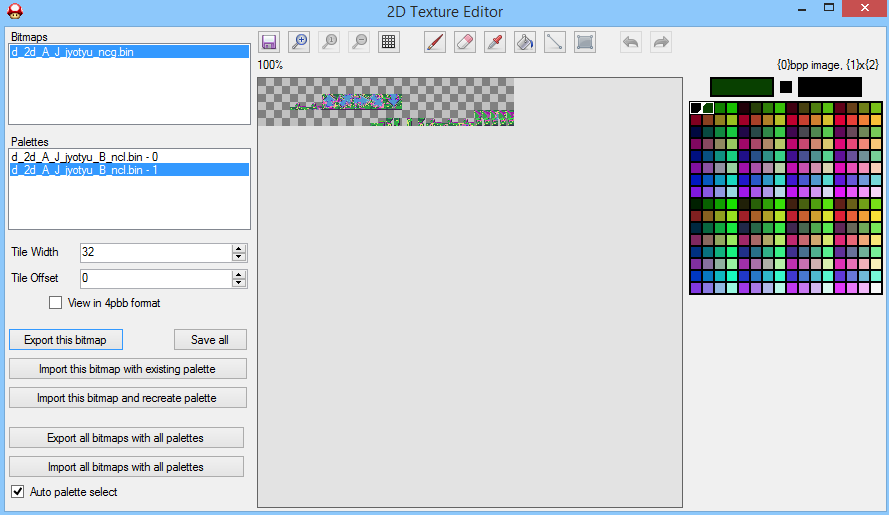 Step 7: From there open both images you extracted with Photoshop, Gimp, etc. Step 8: Take care of the crossed parts and the flagpole base first and then copy the layer and save. 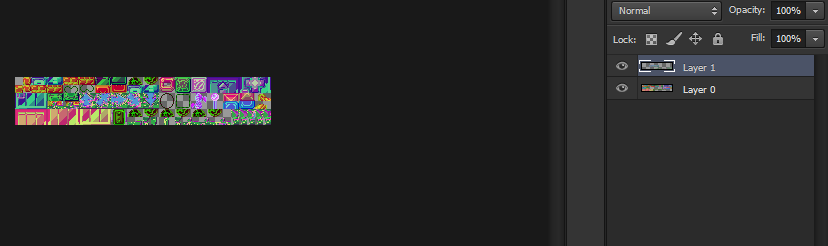 Step 9: Import you fresh new image with the Super Palette by clicking "Import this bitmap with existing palette".  Step 10: Click "Save All" and close the window. Step 11: Remember the ncl you extracted in Step 3 ? Now it is the time to reinsert it. Look at the results:  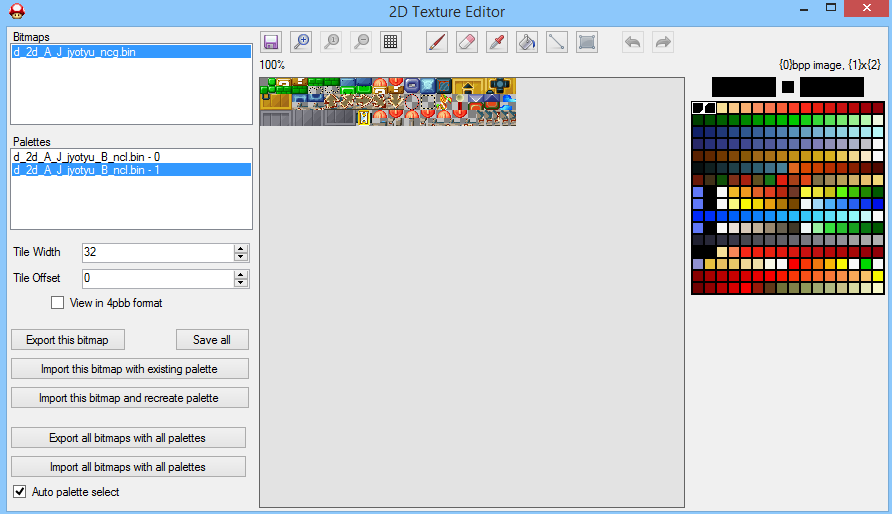 If there is a mistake on the coloring, it will be only on the new tiles, in that case you can either: _fix the few faulty pixels _or try the same operation but with another jyotyu ncl instead. Now enjoy your "flawless" Jyotyu tileset  Notes: Q: Now what if I want to use the Super Palette with other jyotyu ncl? A: I won't give the full answer, what I will tell is that LZ Decompress is going to come handy. Also, don't ever extend Jyotyu available space. While original tiles work fine, supernumerary tiles will look like a scrambled mess in-game. Sorry Thierry but your Extended Jyotyu, while well thought, ultimately fell short 
|
|
|
Posted on 11-25-14, 10:50 pm in v3.1 Super Mario Bros. - The New Worlds
|
|
Death by cuteness
Karma: 6649 Posts: 167/598 Since: 05-01-13 |
Posted by newsuperhackboys The music is glitcher, and it still crashes when I die. I wish I can talk more about, but sometimes the game crashes when it gets to the intro. Did you even read the rules? 
|
|
|
Posted on 05-03-15, 11:27 am in Sprite database overhaul (rev. 5 by
|
|
Death by cuteness
Karma: 6649 Posts: 323/598 Since: 05-01-13 |
Sprite database methodology
I Semantics 1 Trigger IDs 2 Target IDs 3 Comparatives 4 Upper cases 5 Common parameters 6 Official names II Sprite Data III Eventual changes I Semantics 1 Trigger ID: Trigger ID: A Trigger ID, like its name implies, is a trigger that allows a sprite to take action. Trigger IDs often acts themselves as checks, that is if the Trigger ID is null, the sprite will simply ignore it. More often than not sprites happen to have a second Trigger ID, in that case it must also be null for the sprite to ignore it. In that case Trigger ID on bytes 2-3 is the first one, while Trigger ID on bytes 0-1 is the second one. Rarely, in cases were the sprite have 2 Trigger IDs, you must call at least Trigger ID 1 to pass the check. Some sprites have a bit whose sole purpose is to act as the Trigger ID check instead(called Use Trigger ID in the sprite DB); if this bit is active then the sprite will take action only after the Trigger ID has been called, otherwise the Trigger ID is ignored. There are several categories of Trigger ID besides itself: Bridge ID: This is a Trigger ID used by Bowser, Dry Bowser and Giant Bowser. This is the ID the Skull Switch targets to, it triggers the falling animation of the aforementioned bosses. Starter ID: This is the first Trigger ID called by the Multi-chainer controller. Finisher ID: This is the last Trigger ID called by the Multi-chainer controller. Note that Finisher ID must be superior to Starter ID since the Multi-chainer controller increments by +1 each time a Trigger ID is called. Destroyer ID: A special case of Trigger ID. While a Trigger ID usually spawn a sprite, a Destroyer ID, as its name implies, will despawn the sprite upon being called. No matter the category of the Trigger ID, its effects can be reversed by disabling it. 2 Target ID: Target ID: The Trigger ID's counterpart. A Target ID is a Trigger ID the sprite will set On once it takes action. Random ID: A special case of Target ID called by the Random output controller to determine which of the 4 Random ID is going to be called. 3 Comparatives: Bigger, smaller, longer, shorter, slower, faster: those are the likeliest comparatives you'll run into when browsing into the database. Comparatives are special in that they should be one of the few cases you should use the check box at all. Example: You see a check box saying: "Load from checkpoint". At this point you should think: "But wait, what if I don't tick the check box? What'll happen? Where this sprite will load? Will it load at all?" Whereas if you see a check box saying: "Faster", you'll logically think: "So if I don't tick the check box, I know that this sprite won't be as fast as it could be." 4 Upper cases: Multiple words beginning with upper cases should be allowed only on sprites that have an official name AND are labeled as such (for example Banzai Bill Blaster where all the words begin with an upper case letter). Else please… please people, don't abuse upper cases letters for the sprites' names, thank you. 5 Common parameters: We want consistency, so we want to use these whenever possible: Loads from: usually as a 'Level start' and 'Midway point' list Height: if it has more than 2 settings; use a comparative + check box otherwise Length: if it has more than 2 settings; use a comparative + check box otherwise Size: if it has more than 2 settings; use a comparative + check box otherwise Speed: if it has more than 2 settings; use a comparative + check box otherwise Starting direction: Starting position: Direction: Rotation: Shift position: Sticks to a line: as a Yes-No list Trigger ID: Target ID: Zone ID: Path ID: Starting node: Last node behavior: Use Trigger ID: as a Yes-No list Use Zone ID: as a Yes-No list Timer: Tiles to move: 6 Official names: Several objects from NSMB got an official name, use them whenever possible. II Sprite data formulas and calculations For each Class ID, parameters are listed from the likeliest used parameter to the unlikeliest used parameter. For the Speed parameter: default speed is often 60 pixels per second. Sprite 28 (Class ID 35): Self-destruction, if set, happens in 240 frames, or 4 seconds. Sprite 33 (Class ID 237): Small version bounce up by 6 tiles (11 if Mini). Big version bounce up by 18 tiles (29 if Mini). Sprite 34 (Class ID 151): The shift position bit, if set, also make the Red Ring respawn if its Area is reloaded. Sprite 68 (Class ID 161): Length formula is 1+(N11 mod 8). Sprite 71 (Class ID 165): Length formula is 1+(N11 mod 8). Height formula is 2N8 mod 4. Sprite 72 (Class ID 166): Height formula is 2N8 mod 4. Sprite 73 (Class ID 169): Max tilting formula is 60/2N8 mod 4. Sprite 77 (Class ID 173): Length formula is 2+2×(N11 mod 4). Sprite 103 (Class ID 79): Size formula is 1+(N6 mod 4). Sprite 119 (Class ID 228): Amplitude formula is 11.25×N5. Oscillation period formula is 1024/N6. Starting position formula is:  Sprite 126 (Class ID 230): Maximum angle formula is 11.25×N7. Sprite 136 (Class ID 98): Height formula is 2+(N11 mod 8). Sprite 233 (Class ID 184): Height formula is 4+(N11 mod 8). Sprite 239 (Class ID 191): Actual movement is N9-N10. + will go up. - will go down. Sprite 249 (Class ID 209): Length formula is 4+(N11 mod 4). Height formula is 4+(N8 mod 4). Sprite 268 (Class ID 124): Horizontal shifting formula is 2×N10. Sprite 297 (Class ID 167): Height formula is 2N8 mod 4. III Changes proposals Due to new discoveries, standard goes up and what used to be breathtaking yesterday could be considered sub-par today, such is the side-effect of progress. With that I mean that it would be nice if the Sprite database was switched to a Class ID database instead. Since the Sprite is merely a link to the Class ID, the one who holds the real data is the Class ID. This would allow us to put the data found in this thread most notably. NSMBeditor would still have to read the Class ID via the Sprite, which can be done by decompressing overlay 0 and reading the 652 bytes (rather 326 words) from: 0×29BD8 (US)
0×290C4 (EUR)
0×29008 (JAP)
0×290E0 (KS) On the same vein, Sprite sets really are Class ID sets. IV Notes The sprite database overhaul was an issue brought up Sep. 6th 2014, and I only put it in motion May 3rd 2015. I sure took my sweet time, oops… I already changed most of the data as to satisfy the methodology. There's still much left, but the DB is getting there. Data that make the game crash on a real NDS have NO business in the database (with the notable exception of Sprite 274), the reasoning being what point would be achieved to know that putting nybble 11 at 2 on sprite 43 will crash the game for example? Lel I'm going to set it on 2 anyways *plays on real NDS, play, play, play, playity, play, oh encounters Chain Chomp**crashes the game*. Wow! Amazing! Except for crashing the game, I've made no advancement, geez I wonder why? See for all intents and purposes data like that should be wiped out the database, it does absolutely nothing for the average players except maybe confusing them. If anyone as something to say, feel free to do so. |
|
|
Posted on 03-06-16, 05:52 pm in tutorial Animate any background
|
|
Death by cuteness
Karma: 6649 Posts: 375/598 Since: 05-01-13 |
A simple tutorial about how to animate any background you want.
First decompress overlay 0 if it's not decompressed already. Foreground animation table offset: 0×2F734 (US)
0×2EB34 (JAP)
0×2EF48 (EUR)
0×2EBF4 (KOR)
0×2EBF4 (CH) Background animation table offset: 0×2F69C (US)
0×2EA9C (JAP)
0×2EEB0 (EUR)
0×2EB5C (KOR)
0×2EB5C (CH) Each table is 152 bytes long, and contains 2 bytes long data for each of the 76 background slots (1st table) / 76 foreground slots (2nd table). If the data for a given background is 00 00, then this background won't be animated. Offset formula for a given foreground slot is: Foreground_table_offset + (Foreground_slot_number × 2) Offset formula for a given background slot is: Background_table_offset + (Background_slot_number × 2) For example let's say you want to animate both FG and BG 59 the same way than FG and BG 4 respectively on the US version. Retrieve the value used for FG 4: 4×2=8 (0×8); So 2F734+8=2F73C. Read the 2 bytes at offset 2F6A4, which are 07 00. Now go to FG 59 offset: 59×2=118 (0×76); So 2F734+76=2F7AA. Read the 2 bytes at offset 2F7AA, which are 00 00. Now replace them by the value in FG 4, which is 07 00. Retrieve the value used for BG 4: 4×2=8 (0×8); So 2F69C+8=2F6A4. Read the 2 bytes at offset 2F6A4, which are 07 00. Now go to BG 59 offset: 59×2=118 (0×76); So 2F69C+76=2F712. Read the 2 bytes at offset 2F712, which are 00 00. Now replace them by the value in BG 4, which is 07 00. Save overlay 0 and test in-game to see the results by yourself. This tutorial pretty much voids my former tutorial about animating backgrounds. Thanks to |
|
|
Posted on 07-11-16, 06:20 pm in lesson Backgrounds: Tile-Share method (rev. 2 by
|
|
Death by cuteness
Karma: 6649 Posts: 461/598 Since: 05-01-13 |
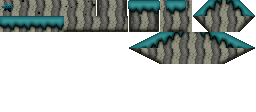
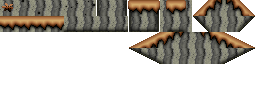
This thread is somewhat out of left field considering my latest track record about ASM mods, but this read will be truly worth your time I hope.
Prelude: First of all I would like to bring your attention about 2 oddities in canon NSMB games: have you ever noticed that there is a chunk of Foreground 5 seemingly missing from its graphics (.ncg)?  And again for Foreground 60?  Then look again, those missing chunks of graphics can be found in the .ncg of Tileset 5 and Background 60 respectively, don't believe me? Have a look by yourselves:   It seems that Nintendo devs used a trick to somehow make the graphics able to be shared amongst one same design, which for the Foregrounds (FG) and the Backgrounds (BG) is stored in a .nsc file. And I would like to call this method the Tile-Share! I will explain you in detail the core mechanics to use this tactic to its fullest potential! 1: Explanation: If you decompress a .nsc file in the BG_nsc folder, the filesize will be 8192 bytes. Now if you remember how FG and BG are designed, you should know that you can choose a 8×8 tile from the graphics with one of 2 palettes, and apply it to a 512×512 template. How many tiles can you fit then in that template? Let's do some fancy mathematics: 512²/8² = (512/8)² = 64² = 4096 4096 tiles per .nsc! And the decompressed filesize for a FG/BG .nsc is 8192 bytes… Could it be… 8192/4096 = 2 Would this mean that 2 bytes of data make up 1 tile? Seems plausible so far. Let's see how… Oh! You know what? I'm just going to tell you the exact data. Each tile takes 2 bytes, which means that each tile's offset begin at an even address and end with an odd address. Due to the data being little-endian, you must invert the 2 bytes to read them correctly, ergo instead of reading them as AB CD read them as CD BA. The tile order in the .nsc matches the tiles from the 512×512 template when read from left to right. If you don't want the binary details, jump to the next sub-section. Convert the data from hex to binary, upon conversion the data is laid out as follows: PPPPVHTT TTTTTTTT In order: _T is the Tile Number in 10 bits, it can take a value from 0 to 1023 inclusive. _H is the Horizontal Flipping bit, which will take effect only when set to 1. _V is the Vertical Flipping bit, which will take effect only when set to 1. _P is the Palette Number in 4 bits, it can take a value from 0 to 15 inclusive. It is totally possible to read the tile data in hex, here's how: _truncate the word (2 bytes) CDBA as C and then DBA. C is the palette, and there's DBA: _If D < 4, then you've already got the Tile Number DBA, HFlip=0 and VFlip=0. _If D >= 4 and D < 8, then HFlip=1 and thus to retrieve the Tile Number you must subtract 4 to D. _If D >= 8 and D < 12 (0xC), then VFlip=1 and thus to retrieve the Tile Number you must subtract 8 to D. _If D >= 12 (0xC), then HFlip=1 and VFlip=1, thus to retrieve the Tile Number you must subtract 12 (0xC) to D. Now we can enter the second part of the tutorial, what the Palette Number and the Tile Number really refer to! 2: Abuse the palettes: It's nice to know that the Palette can take a number from 0 to 15 and that the Tile Number can be anything from 0 to 1023, but what good does this do if you don't even know how this data is interpreted? Which is where DeSmuMe comes to the rescue! If you open your NSMB ROM with the emulator and play through a level, pause the game and then go to Tools -> View Tiles. This will open the TILE VIEW window. Select 256 colors. In the first combobox beginning from the top, select Main screen ExtPAL 3. In the second combobox, you can toggle between A-BG - 0x6000000 and A-BG - 0x6010000. For the palette, select something between 8 and 11 inclusive. Now look what we have there: 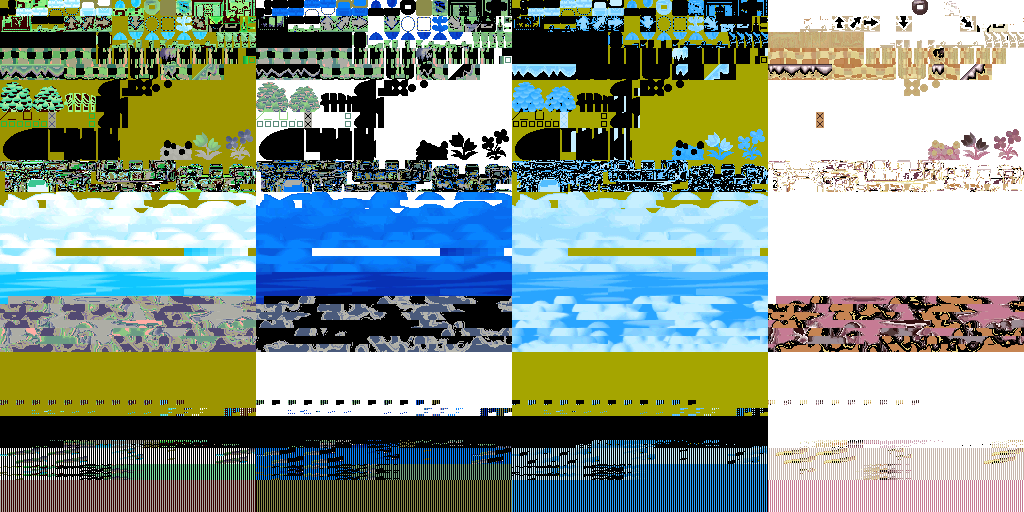 Doesn't this look familiar? 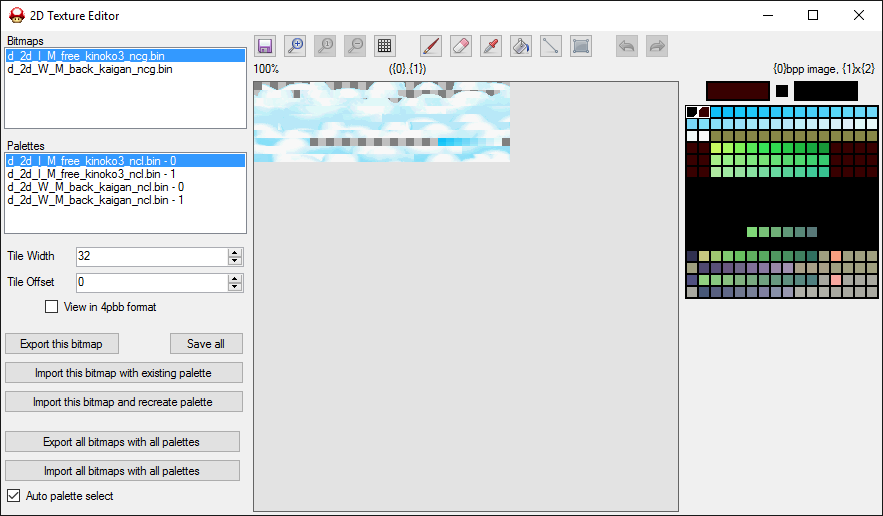 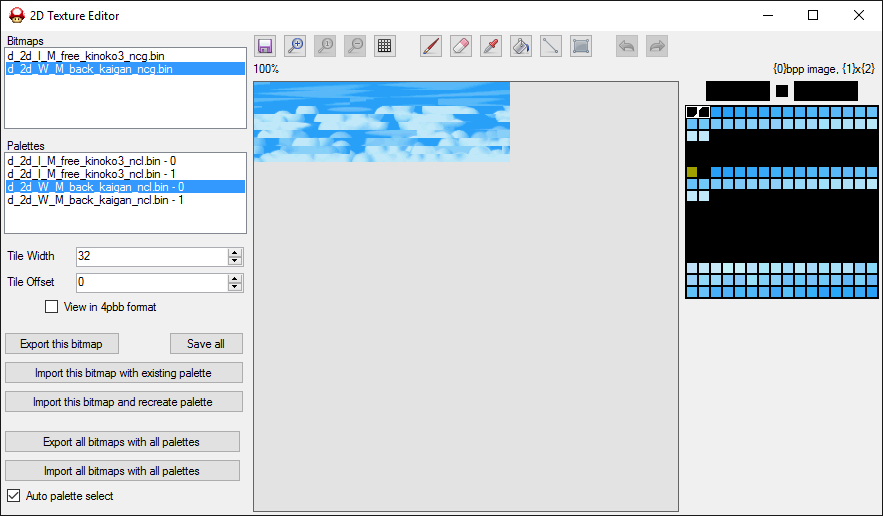 It sure does. This is because of several factors: _the FG .ncg is stored in the VRAM at address 0x600A000. _the BG .ncg is stored in the VRAM at address 0x6011000. _the palettes for FG and BG are always loaded in Main screen ExtPAL 3. _Palette Number for FG is 8 or 9 by default. _Palette Number for BG is 10 (0xA) or 11 (0xB) by default. Be careful, the BG is written before the FG, which means that you can completely overwrite the BG with the FG due to the former being written in the VRAM at a later address than the latter. Look at the palette numbers! Those are the exact same numbers than in the .nsc… is this a hint? The conclusion is really simple, both FG and BG can read from palettes 0 to 15, which automatically includes palettes 8 to 11. What does it mean? That you can make the FG read the BG palette on top of its own and vice-versa! Pretty neat, isn't it? But that's not all, what I actually shown you was just the icing on the cake, but where's the main treat? If you continue to read you can eat that cake at your heart content! 3: Abuse the tiling: Remember what I told you about the Tile Number, which can take a value between 0 and 1023. Now have you noticed that in the FG .nsc, most of the time no Tile Number was under 256 (0x100)? This is where the VRAM read Tile Number 0x100 (pinpoted thanks to the magenta square):  Which matches the address 0x600C000 In the same vein in the BG .nsc, no Tile Number was under 576 (0x240)? Tile Number 0x240 is read there in the VRAM: 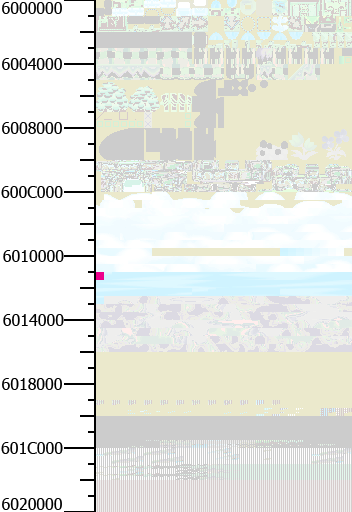 Which matches the address 0x6011000 So where would Tile Number 0 ends up in the VRAM? An answer that can be answered mathematically once again: (0x6011000 - 0x600C000) / (0x240 - 0x100) = 0x5000 / 0x140 = 0x500 / 0x14 = 0x40 or 64 in decimal So this means that 1 Tile with a vertex of 8 pixels occupies 64 (0x40) bytes in the VRAM. If we want to demonstrate with a mathematical reasoning where would Tile Number 0 be read, we need to follow this formula: V-(T*D) where: _V is the VRAM address _T is the Tile Number who is read at address V _D is the Tile Number data size, which is always 64 (0x40) Let's see: 0x600C000 - (0x100 * 0x40) = 0x600C000 - 0x4000 = 0x6008000 Let's calculate again: 0x6011000 - (0x240 * 0x40) = 0x6011000 - 0x9000 = 0x6008000 Both results match, and indeed it is the case in a real setting too: Tile Number 0 is written in the VRAM at address 0x6008000. As an additional proof, FG 5 .nsc has some Tile Numbers as low as 64 (0x40) which in the VRAM points to address 0x6009000. 0x6009000 - (0x40 * 0x40) = 0x6009000 - 0x1000 = 0x6008000 You get it, Tile Number 0 -> address 0x6008000 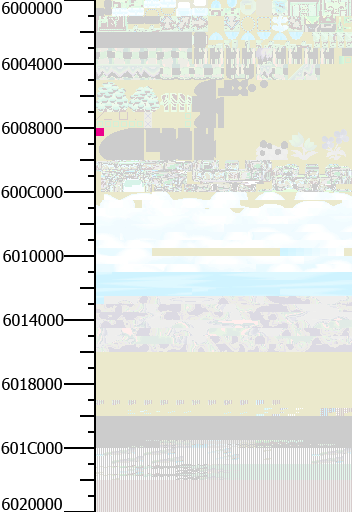 But what about the highest Tile Number, the 1023rd one (0x3FF)? 0x6008000 + (0x3FF * 0x40) = 0x6008000 + 0xFFC0 = 0x6017FC0 Tile Number 1023 -> address 0x6017FC0 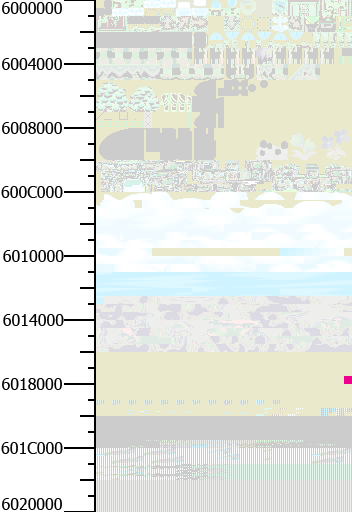 All in all it means that the .nsc, by virtue of being able to read up to 1024 Tile Numbers, have an effective range of 65536 bytes (0x10000) from 0x6008000 to 0x6017FFF included!  AND this is how Nintendo did to add what would seem to be additional tiles to FG 5 and FG 60! Additional notes: Some more information before you go abusing that trick: _SubNohara is written at offset 0x600A000 and has a native and max range of 0x2000 _Tileset 1 is written at offset 0x6003000 and has a native range of 0x7000, and a max range of 0x9000 (tiles behaviors have a max range of 0xD000 though, use the FG to your advantage) _BG is written at offset 0x6011000 and has a native range of 0x5000, and a max range of 0x7000 _FG is written at offset 0x600C000 and has a native range of 0x5000, and a max range of 0xC000 The layers are presented in the order they are written in the RAM, which means that if 2 layers overlap, the latter will overwrite the former. Also be careful about additional animations for some Tilesets and FG! Some thoughts for NSMBe: _due to this new information, I think the way NSMBe open the Top and Bottom Backgrounds should be changed, for example after clicking one of the BG, it should open a window from where you can choose a Tileset and then a FG (or BG if you choose to open a FG), once you have confirmed your choices, it will bring you to the Tilemap editor but with the increased range and 4 palettes. NOTE 1: You can abuse this trick with the SubNohara V2 ASM-Hack, but Tile Numbers above 895 (0x37F) will fall out of range! This is because Tile Numbers above 255 (0xFF) automatically get added the number 128 (0x80). NOTE 2: No tummy ache after eating this appetizer? Good, because after all it only was a prelude, or a hype tool if you wish for the next ASM Hack of mine, which will be the main dish if you allow the euphemism! |
|
|
Posted on 08-01-16, 08:40 am in Misc. patches thread (rev. 3 by
|
|
Death by cuteness
Karma: 6649 Posts: 506/598 Since: 05-01-13 |
Include setting to freeze Timer per View:
repl_020A2758_ov_00:
STMFD SP!, {R1-R4, LR}
LDR R1, =0x208B35C
LDR R1, [R1]
LDRB R1, [R1, #0x2BE]
LDR R4, =0x2086A2C
LDR R4, [R4]
LDR R2, [R4, #0x38]
ADD R2, R4, R2
LDR R3, [R4, #0x3C]
ADD R3, R2, R3
.LoopGetView:
LDRB R4, [R2, #0x8]
CMP R4, R1
BEQ .OutLoopGetView
ADD R2, R2, #0x10
CMP R2, R3
BCC .LoopGetView
.OutLoopGetView:
LDRB R1, [R2, #0xA]
LDRB R2, [R0]
TST R1, #0x80
ORRNE R2, R2, #0x40
BICEQ R2, R2, #0x40
STRB R2, [R0]
LDRB R0, [R0]
LDMFD SP!, {R1-R4, PC}
repl_0201E07C:
LDRNEB R0, [R0, #0xA]
BIC R0, R0, #0x80
BX LR
repl_0201FCC0:
BIC R0, R0, #0x80
STRB R0, [R5]
BX LR How to use? _click Hex Edit on the level you want to modify _go to Block 8 _rearrange the window so that each row (View) contains 16 bytes of data _go to byte 10 (counting from 0) _this byte is for the music, since any music equal or above 0x70 is mute (according to the code anyway), this is the byte I chose to change _to freeze the timer for the selected View, set Music bit 7 at 1, or simply put add 0x80 to the music number. This is best used in tandem with this mod, who was also updated! Works on a NDS. |
|
|
Posted on 05-03-14, 08:36 pm in Help/Question Asking Thread
|
|
Death by cuteness
Karma: 6649 Posts: 86/598 Since: 05-01-13 |
The purpose of sprite 45 is to provide a player an emergency invisible brick in case he inavertedly destroy a platform (Mega-Mario, Bob-Omb, Giant Thwomp) that was needed to complete the level.
This sprite can spawn an unlimited number of times, even if you destroy it. As you can see in this screen, since the sprite 45 actually detects a solid object 4 tiles left and 3 tiles down, the invisible brick won't spawn until the solid object is destroyed. 1 Usually you can leave Camera X and Y values as 0, but sometimes you need to put values in there : The entrance 3 doesn't actually have any purpose in-game (in fact it doesn't even exist in that level) but to showcase the coordinates. The purple rectangle delimits what you can see on the NDS screen. If at least one of the Camera values is different from 0, then the tile at said coordinates will calibrate the camera and will serve as the top-left tile of said camera. You usually use them when sprites 198-199 and/or 276 are in the way, or eventually to calibrate the bottom of the camera to the bottom of the zone. The purpose of this is to show a nice transition when you change areas. With the example earlier if both value were at 0, this is where the camera would spawn by default. The camera is 1 tile higher than the bottom of the zone, but the biggest offender here is the sprite 276, it is only acknowledged when the player have control of Mario thus only when Mario completely exits the pipe, the camera would recognize sprite 276 and then scroll to the left at high speeds, which results in an ugly transition and you can bet this is a rookie mistake to leave that kind of camera error unchecked. 2 I'm assuming you're talking about bottom and top backgrounds in levels, then yes there's a way to change the palette. 3rd byte (in red) is the .ncg, 5th byte (in green) is the .ncl. Instead of double-clicking an area or clicking Edit Level, you should click Hex Edit, from there go to block 3 (if you want to work on the bottom background) or block 5 (for the top background). One trick you can use with palette changing is that since animation is tied to the .ncg and not the .ncl, you can for example put the background 4 (Clouds) with the palette 59 (Yellow clouds) to create Yellow clouds with animation. 3 No you can't, it doesn't work like that. That being said, there's a way to put more than 2 palettes (this trick works only for tilesets AFAIK). Each tileset can handle a maximum of 4 palettes, but the only one who natively use 4 palettes is the tileset 9 (Beach), export the .nmt then import it in every slot you want to use 4 palettes, but you'll have to do everything else by yourself (like you would do when creating a new tileset). |
|
|
Posted on 11-02-14, 10:14 pm in Tileset List
|
|
Death by cuteness
Karma: 6649 Posts: 144/598 Since: 05-01-13 |
Thanks.
Here's something I did and I will share, I'm going to list all the tilesets who don't have randomized tiles: 1, 32, 41, 45
4, 59
17, 26, 28
18
21, 67, 68, 69, 70, 71, 72
22
23
29
30
42
43
44
46
47
49, 62
55
58
61
63
65
74 Also, there are 4 oddities when it comes to randomization, the four underground tilesets (3, 35, 36 and 73) actually have 2 rows of randomized tiles ! The first one for tiles 0 to 5, as always, and the second one for tiles 48 to 53. |
|
|
Posted on 12-06-14, 12:19 pm in The single levels thread!
|
|
Death by cuteness
Karma: 6649 Posts: 180/598 Since: 05-01-13 |
Not a level per say, but I thought it would be nice to showcase some cool things Bowser Jr. can do. Everyone is free to borrow the idea. Also if "Impossible to stomp on" is enabled, Bowser Jr. will try to flee during the 3rd phase ; if he manages to do so, you will have to throw yourself into a pit and lose a life. |
|
|
Posted on 01-28-15, 09:56 pm in hamza62240 (rev. 1 by
|
|
Death by cuteness
Karma: 6649 Posts: 216/598 Since: 05-01-13 |
So what is this?
Not only he left the place, not once but twice, because he was butthurt and couldn't take advice without throwing a hissy fit but on top of that he thinks he can come back and waltz in like nothing ever happened? NO! After his poor behavior, hamza better do a thorough apology. And I personally won't approve nor acknowledge his posts until he does. What I'm going to say is not nice but it has to be said, we're better off without someone who can't pay due respect to his superiors. Really mods and admins are supposed to be respected, what do you think will happen when they let someone who can't control his "mental breakdowns" back without sternly lecturing him, hmm? I'll tell you, mods/admins will lose their "dignity" so to speak and their reputation will be tainted. A community whose leaders let their members do as they please will surely collapse! Maybe I'm taking this to much at heart. But really after hamza "threatened" to leave the place twice, one can only reach the conclusion that some mistakes are NOT to be allowed. Is leaving a forum and coming back so much of a simple thing? WHAT DO YOU THINK POSTING OR MODERATING A FORUM IS, A KID'S GAME?!! I'm willing to let bygones be bygones and give hamza a chance at redemption, BUT, if hamza has no intention of asking for forgiveness and tries to pass under the radar, then the next one to go is ME! And unlike hamza I will keep my word. I would rather stay at the station watching the train wreck happening from afar rather than being in said train when that happens. This is not in the moderator section because you know, I'm not a mod. But I think it's better that way because it allows for anyone who wants to to give their opinion on this, even you hamza. To the mods: If you consider to delete my post and the thread, I want you to at least know that the purpose of this thread is not to cause drama but rather I think it's necessary to straighten things out. |
|
|
Posted on 01-30-16, 10:08 pm in beta 2.0 Pokemon MindCrystal (rev. 9 by ImageBot on 11-21-16, 03:18 am)
|
|
Death by cuteness
Karma: 6649 Posts: 336/598 Since: 05-01-13 |
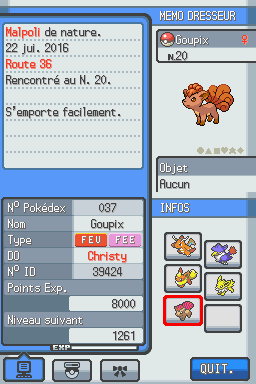
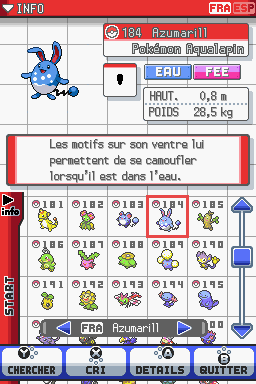
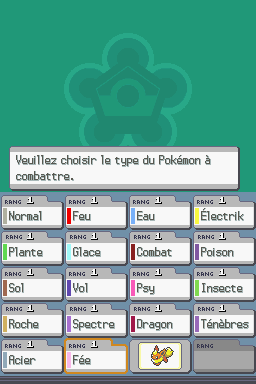
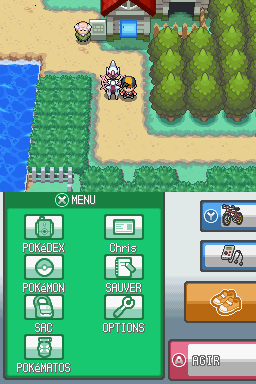
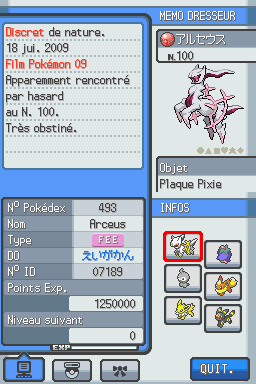
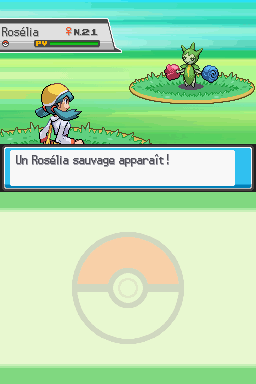
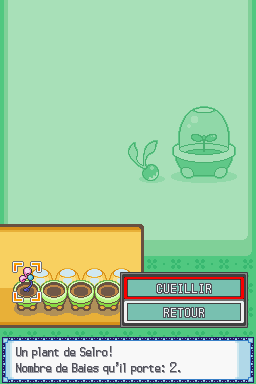
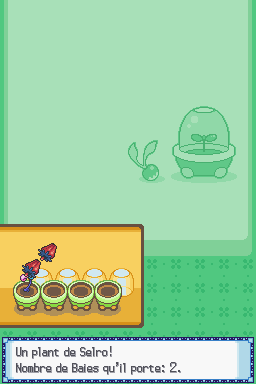
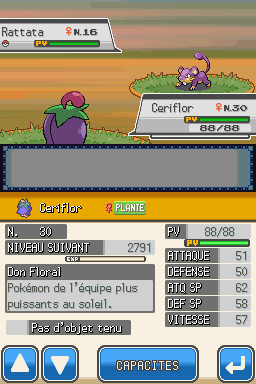
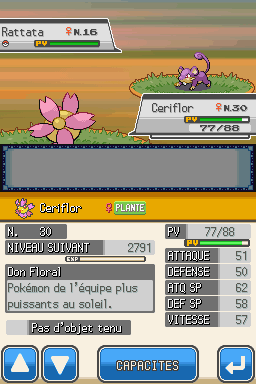
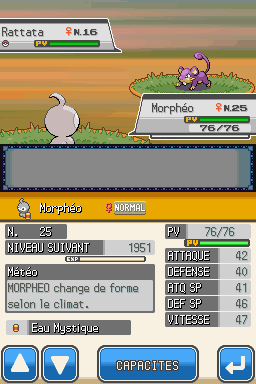
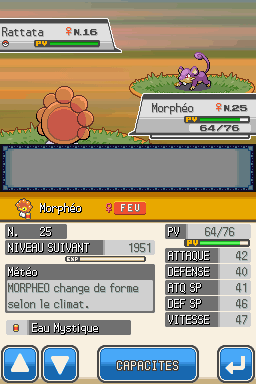
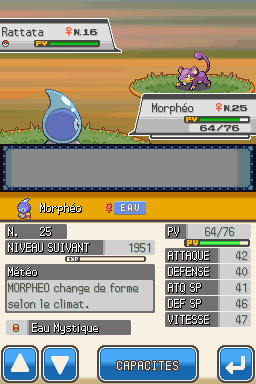
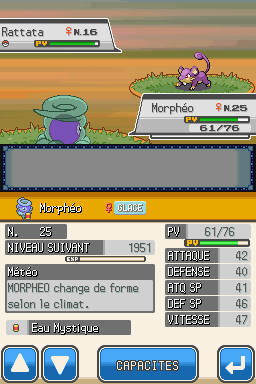
 I'm glad to present you Pokémon MindCrystal, a mod of Pokémon SoulSilver. I warn you though, this hack is available only in French. The crux of this hack is obviously the inclusion of the Fairy-type at 100%. Most of the changes were done from a technical standpoint. These are the few parts of the storyline that were changed as of now:
Grab the xDelta patch at the bottom of this post and patch it with a French version of Pokémon SoulSilver. 
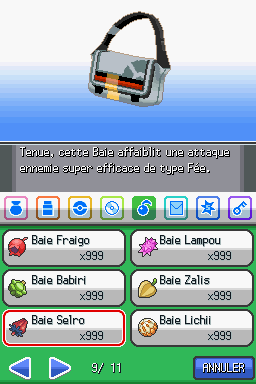
Fairy-type moves: Move Power Accuracy Category PP Priority Effect
Comet Punch 18 85 Physical 15 0 -
Slam 90 90 Physical 10 0 -
Sweet Kiss - 75 Status 10 0 Confusion
Charm - 100 Status 20 0 -2 Attack
Attract - 100 Status 15 0 Infatuation
Moonlight - - Status 5 0 Restore HP
Follow Me - 100 Status 20 2 Center of attention
Extrasensory 90 100 Special 20 0 20% flinch
Covet 40 100 Physical 25 0 Steal items
Captivate - 100 Status 20 0 -2 Sp. Attack for opposite gender  Battle Frontier:
Battle Tower:
Battle Hall:


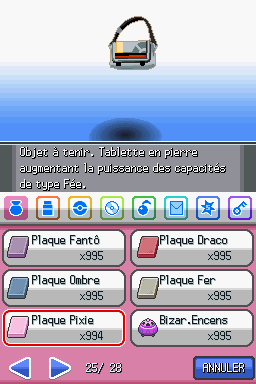
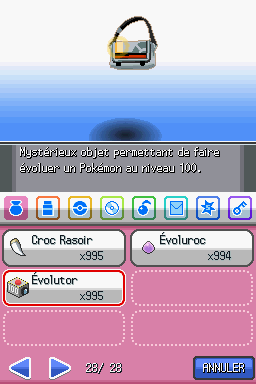
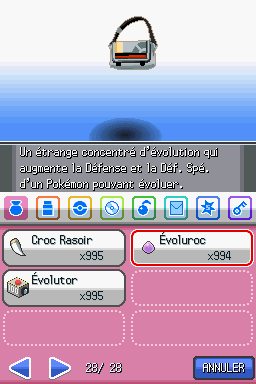
 Updated Items:
New Items:

 Updated Abilities:
New Abilities:

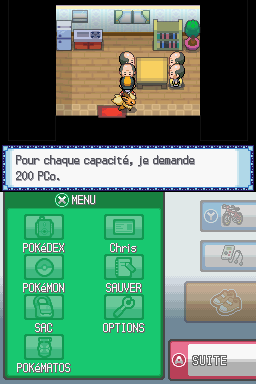
 Title Screen: 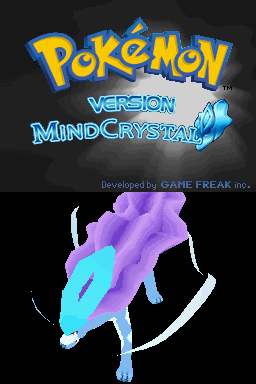 All of those modifications were carefully tested on a NDS, so as to reduce as much as possible the eventual bugs that might occur. Credits: _Nintendo _Game Freak _Creatures, Inc. _Sora Ltd. for developing Super Smash Bros. Brawl, from whom Suicune's model on the title screen is taken from _Gregarlink10 (http://gregarlink10.deviantart.com/) for making Kris' spritesheet _NyaChan (https://twitter.com/nyachan) for making the Title logo (http://forums.bulbagarden.net/index.php?threads/the-bulbagarden-conversational-chat-thread-vol-2.57572/page-31#post-1504991). Enjoy Link to beta 2.0: http://www.mediafire.com/download/lz83do1q3gc331b |

|
|
Posted on 01-31-16, 11:37 am in The single levels thread!
|
|
Death by cuteness
Karma: 6649 Posts: 337/598 Since: 05-01-13 |
Some cool things you can do with a little knowledge of ASM:
If you want to test yourselves, here's the download link: http://www.mediafire.com/download/1l2zim2rdjyne6x To patch with the European version of NSMB. The only hack not featured is the Horizontal scrolling for Sprite 255. |
|
|
Posted on 07-05-16, 05:05 pm in Misc. patches thread (rev. 2 by
|
|
Death by cuteness
Karma: 6649 Posts: 449/598 Since: 05-01-13 |
Go there to fetch the updated code! While the Blockhopper code is mostly unchanged, the code now takes into account the remaining Jyotyu tiles in the enemy folder. |
|
|
Posted on 07-20-16, 09:30 pm in Misc. patches thread
|
|
Death by cuteness
Karma: 6649 Posts: 476/598 Since: 05-01-13 |
Star Coins are worth 4000 points:
repl_02154C8C_ov_36:
MOV R1, #6
BX LR This is a porting of the code into ASM-Template format, but this is not the main topic behind my post, however: Posted by skawo This really seems like a perfect thing to ASM Hack to use separate palettes, you know. Wink Wink Nudge Nudge Poke Poke  Tested on a NDS. Dedicated topic tomorrow, because right now I'm too tired due to the fact that NSMBe doesn't know how to handle .bncd files in 8bpp mode, pretty much forcing to edit the files the old-fashioned way (read: hex-editing). I warn you, this is not quite what you would expect: while world-map icons no longer are restricted to 15 colors, they have to share the common 255 palette, this will be explained in detail. |
- NSMBHD
- Forum index
- Member list
- +1'd posts