Pages: 1
| Toms |
Posted on 04-07-19, 06:30 pm
|
 Goomba GoombaAffected by 'Blind Syndrome' +  Karma: 294 Posts: 21/22 Since: 08-15-16 |
Like every NSMB game, NSMB2 uses lots of different event based mechanics in its' levels. An event is an action usually triggered by the player that could cause something to change in the level, such as causing a platform to rise and fall, or breaking a wall of bricks, or even spawning in a star coin. This guide will walk you through setting up and using various different types of event controllers.
Switches Switches are probably the most common form of event controlling in any NSMB game, and it's also the most simple to set up. When a player hits the switch, that particular event is activated. Switches can also be placed in brick blocks to make them more hidden. For this example, we'll set up an orange question mark switch (sprite 223) to break ring of blocks surrounding a star coin 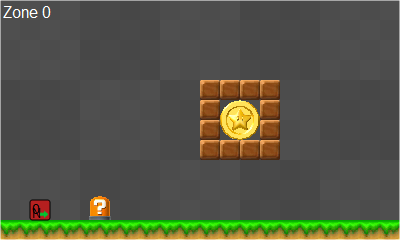 Next, we need to set up the switch so it does something when pressed. The Target Event ID is the event that is being activated when the switch is pressed. The switch also has some other options, which are fairly self explanatory. The location ID setting is there mostly for blue P switches which will be looked at later. Here's how I set up my switch for this particular scenario.  Now that the switch is set up, we can connect it to the tilegod, which will destroy the blocks. Since the switch is set to activate event 1, the tilegod must also be set to be triggered when event 1 is activated. This is done by matching the triggering event to the target event from the switch. The tilegod can also be set up with hieght and width settings to affect what blocks are destroyed. 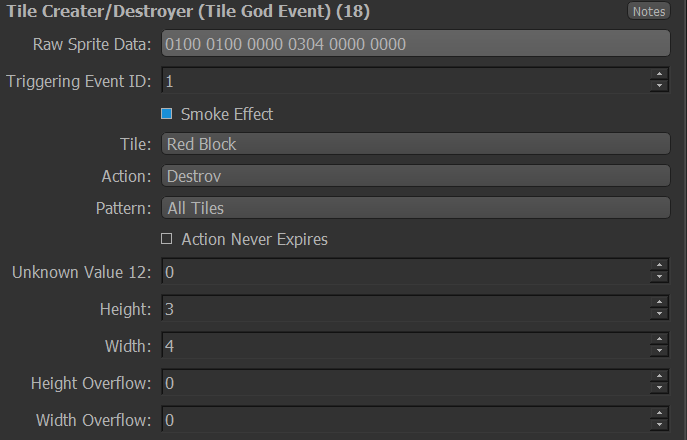 Now when the switch is pressed, the tilegod will activate and break the blocks around the star coin, allowing the player to grab it. 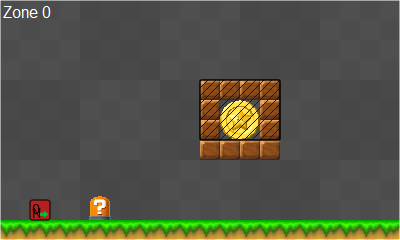 As mentioned before, switches have a setting for a location ID. This setting is used for the clapping controller when all of the blue P-switch coins are collected. In NSMB2, P-switch coins are only tiles and don't have a sprite variant which can be tied to a controller. To remedy this, Nintendo added the Location ID setting, which counts all of the P-switch coins collected within a certain location. If all of the coins are collected, then the clapping effect will be played. Here is how it's set up in 1-Tower. 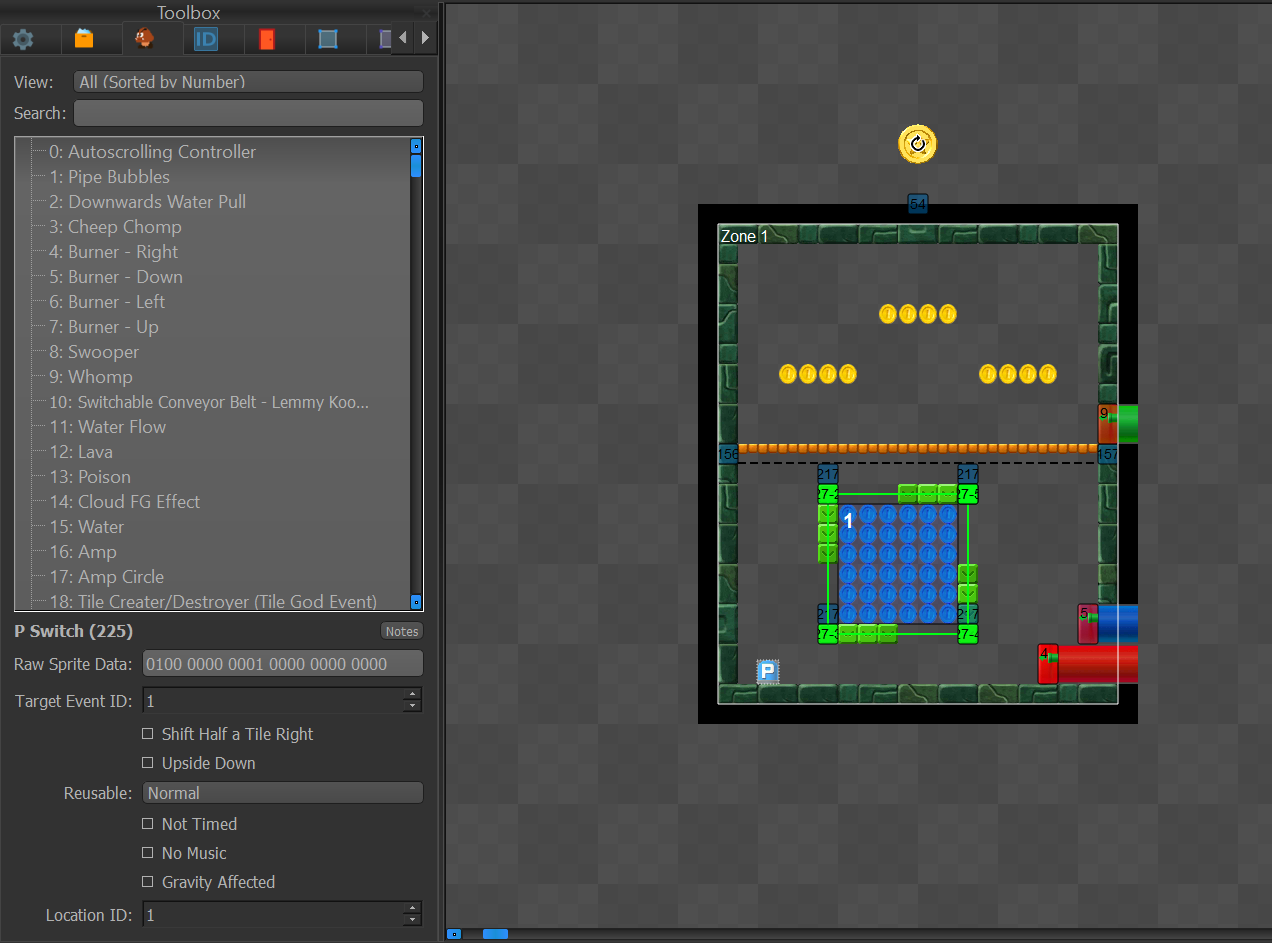 Location Controller The Location Controller (sprite 85) is also another common way of activating events in a level. It looks for a player/enemy within a specific area, and if the criteria for the controller is met, then the event is activated. the controller has lots of different options, such as checking to see if a player has a specific power-up, and even seeing if the player is on the ground or in the air. It can also check for enemies and their statuses as well. Something extremely important to note is when you're selecting the location you want to be checked for the player or an enemy, make sure to tick the box for "ignore" under the opposite entity. The controller can check for both players and enemies, but when both locations are filled out, the event will only be activated when the enemy has been killed in that specific location. For this example, we'll set up an enemy ambush where the player needs to kill goombas in order to get a star coin. 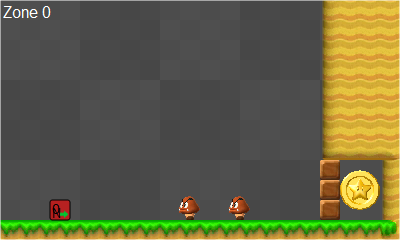 The controller needs to know where to look so place down a location that covers the area. I would suggest making the location as big as possible in this case, as the goombas can move around. 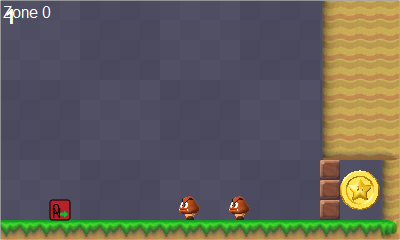 Next, we need to actually set up the location controller to activate the event when the goombas are killed. This controller also has lots of options are self explanatory and add lots of functionality to whatever you're making. Here's how I set mine up. 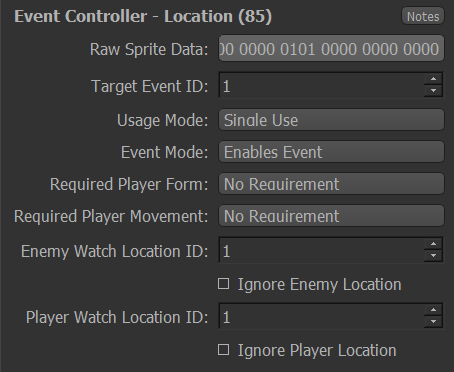 Finally, we just need to add a tilegod to break those blocks once the event is activated. See above to the switch example if you're unsure of how to do this. Zone Enter and Onscreen Controllers These controllers are more simple controllers that activate an event for an extended period of time. Zone Enter (sprite 86) activates an event for the duration of a player being in a specific zone. On Screen (sprite 88) activates once the controller is on-screen. both can have a delay added to when the event is activated. Chainers and Multichancers Events can be chained together using an event chainer (sprite 84) or a multi-chainer (sprite 87). These can be used in lots of different ways, like breaking down a bridge on a timer, or spawning in coins with a little delay for a nice effect. They're also vital for making giant event monster machines like this one I made. 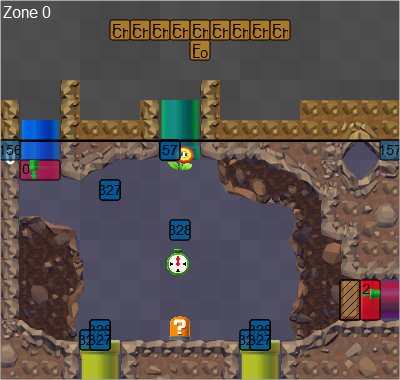 Chainers are very simple to set up. All it needs is a triggering event to start it, and a target event. You can add a delay, make it disable an event, and so on and so forth. Here's an example of a chainer I made.  Multi-chains are even easier to use. It needs a starting event (what will trigger it) and an ending event (how many events will be activated after it's triggered. There can also be a set delay added as well. Here's a multi-Chainer I've made as an example. 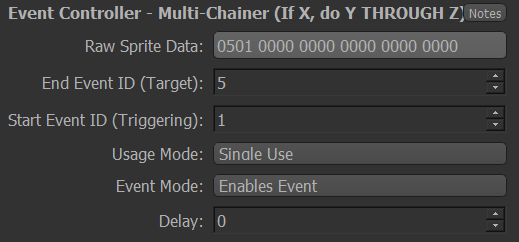 This video also demonstrates the use of multi-chainers really well. Other Dotted around the controllers are similar options such as a usage mode and an event mode. These settings can be used to give the controllers a single-use or multi-use, meaning that they can be used multiple times. The event mode can be used to deactivate events, should you want something like that to happen. Looking at levels with more complex events connected to each other and wanting to make something like that can be daunting, but all event controllers all have the same basics. They're just able to be connected together to make some really cool mechanics and puzzles. This is a level I made using all of the above mechanics, and personally, it's one of the better designed levels I've made. If you have any questions, please feel free to ask here or on Discord |
| Rev. Falls |
Posted on 09-25-22, 10:51 pm
|
|
Newcomer
Filete Grande El Conquistador  Karma: -50 Posts: 4/7 Since: 09-25-22 |
This will be very helpful. Do you have any more level examples? I just need a spark of inspiration, to see what these can do. These are awesome…
|
Pages: 1