Pages: 1
|
|
Posted on 03-28-19, 01:21 am
|
||||||||||||||||||||||||||||||||||||||||||||||||
 Micro-Goomba Micro-GoombaLocal mod  Karma: 175 Posts: 4/14 Since: 10-17-16 |
Explos Disclaimer - this guide will not cover modeling or importing your map.Before you start you will need two things, RouteEdit, and modeling software capable of manipulating bones, in my case I am using Blender, but feel free to use anything. There are various node types that are used within the NSMB2 world maps, their names and purposes can be seen below. (Any x's or y's in the node names are placeholders and are intended to be replaced by a number.) Course Nodes
Misc Nodes
Map Object Nodes
Setting Up A Basic Map StructureFirst you should plan your map layout, determine where you want your level nodes to be, then after deciding on a layout, you should go ahead and model it. Things to keep in mind when modeling:
For demonstration purposes, I have created a simple map containing only some paths. 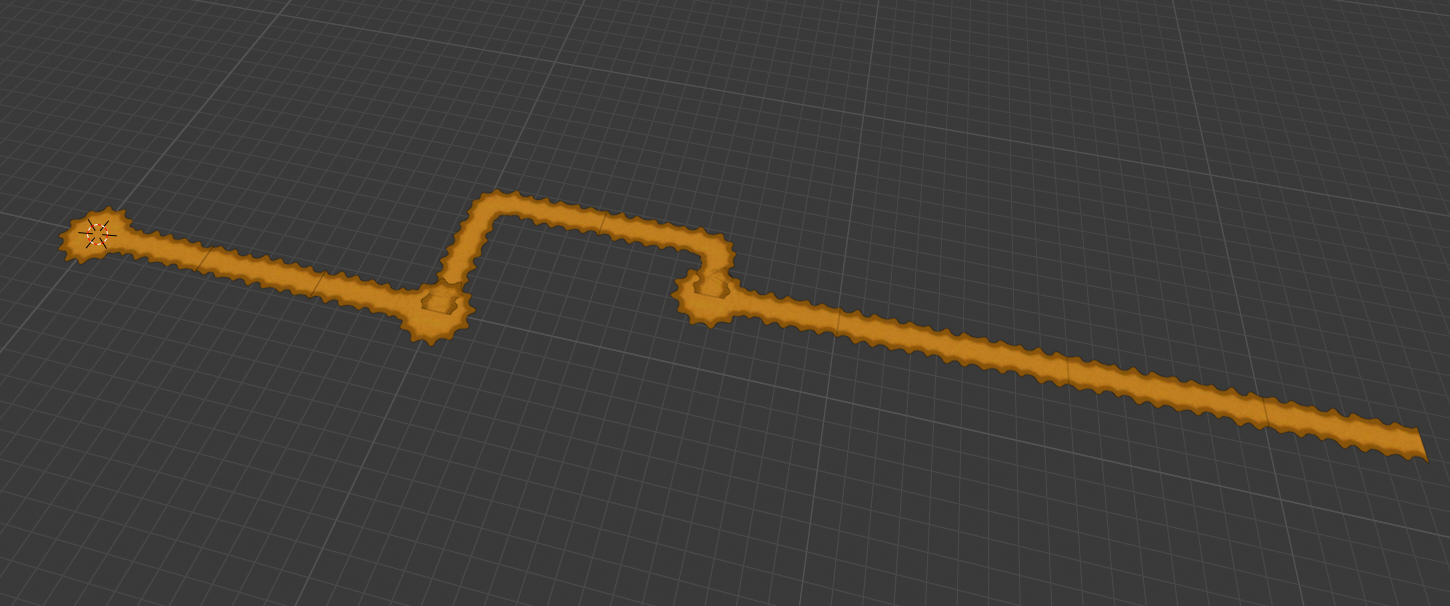 Adding Level Nodes To Your MapOnce you are done modeling your map you will want to create the bone structure. Every map needs a bone structure with a root bone named "CS_Wx", replacing the x with the world number, and two child bones named "course" and "route". I would recommend placing these bones in the center of your map, however these bones don't have to be placed anywhere specific. 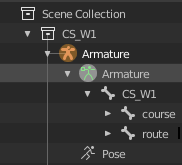 Now, to add your level nodes you will want to create bones that are child bones of the "course" bone. These bones must be one of the Course Nodes listed above. The only required course node is a "WxMy" node, this will create your maps start node. When creating your bones you may notice an issue, the bones are attached directly to the "course" bone, to fix this in Blender you will want to open the bone properties panel and uncheck "Connected", this will allow for your bone to be moved freely. 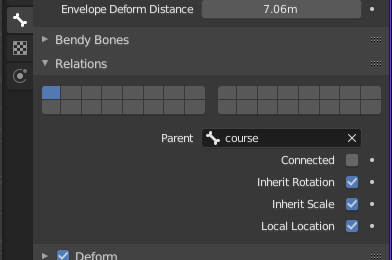 Once you have created your bone, position it where you want the node to be. Repeat this procedure for any other level nodes you wish to add to your map. 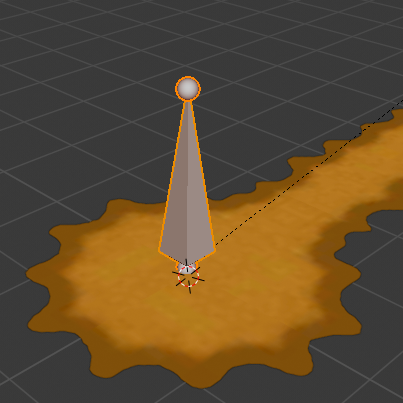 When you are done placing all of your level nodes you should have something that looks similar to this. 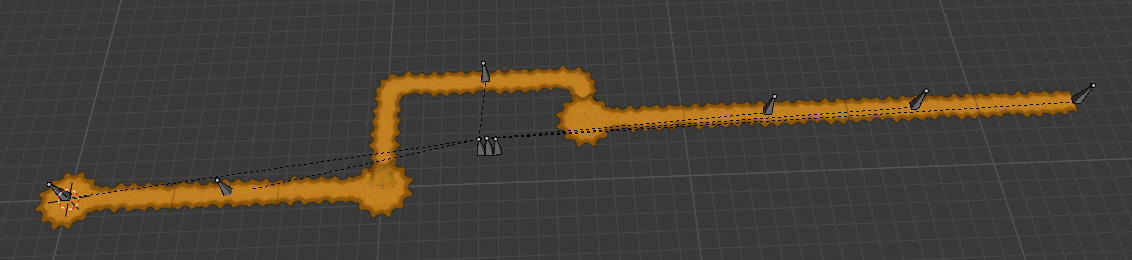 Adding Map ObjectsIf you have added nodes for a level such as a Castle or a Tower you will want to add the associated map object for that level type. To add a map object you will first want to select the bone for the associated level, and add a child bone to that node, this child bone must use one of the Map Object Node names listed above. Here I have added a castle object to my castle level. 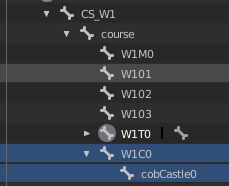 After adding this object you will want to position it appropriately. 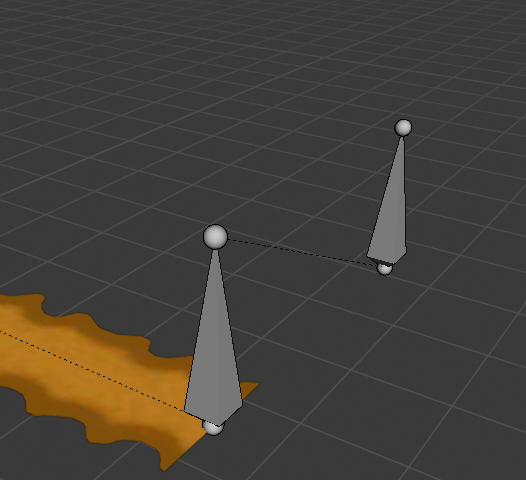 You will want to repeat this process for any of your level nodes that have an associated map object. Adding Routes To Your MapAn important aspect of a map are the routes that connect the level nodes, so to create these you will want to add child bones under the "route" bone. All routes must have an "R" prefix in their name. Creating Normal RoutesRoutes must be named using the following structure: "RNODE1NODE2" - an "R" prefix, then the name of the two nodes that the route connects. For example the name of the route going between the nodes for W1-1 and W1-2 would be named RW101W102. Once you have create a route node you will want to position it between the two level nodes it connects. 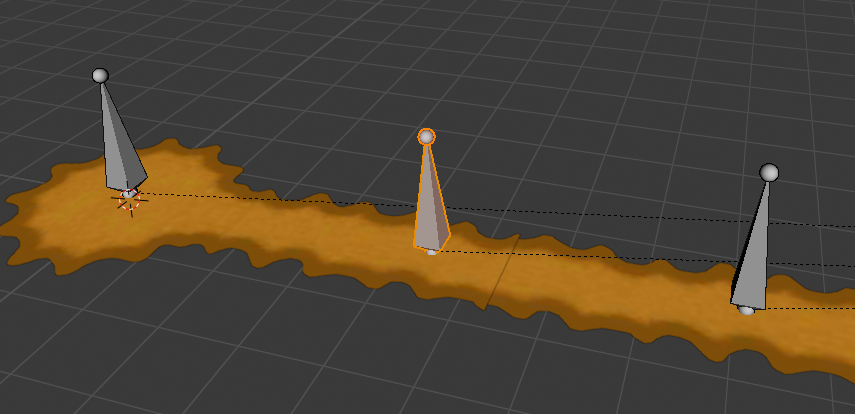 Creating JunctionsIn some cases you may want to add a junction to your map, allowing the player to go down multiple paths, in this case you will want to add a route that leads to a junction. To do this, you will want to create a route that has NODE2 replaced with a "F00y" node. Then, to this newly added bone you should add a child with the same name as your "F00y" node. 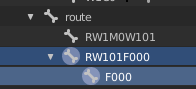 You will then want to position these nodes with the route between the two nodes, and the "F00y" node in the center of your junction. 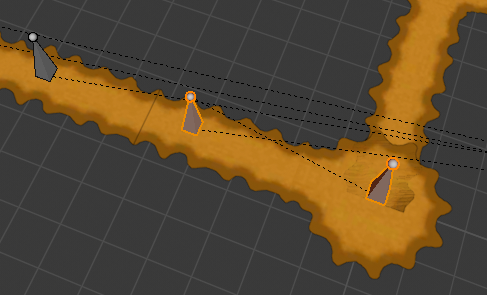 Creating CornersTo Create a corner in a route you should create a route the same way you would a normal route, following the "RNODE1NODE2" naming structure, but then after creating this you will want to add a child bone, this child bone should be a "K00y" node.  Once these two bones are created you will want to position them so that the route node is between the first node and the "K00y" node, and the "K00y" node is positioned on the corner.  Configuring Route PropertiesIf you have made any changes to the bones in your map you need to edit the route info, the original route info is likely not going to work with the changes you have made and therefore we need to configure it appropriately. To modify the route info we use RouteEdit, you can download it here. Inside of the "CourseInfo" folder in your romfs you will find a file called "RouteInfo.sarc", you will want to open this file with RouteEdit. Configuring NodesTo configure nodes you will want to select the "Node Unlocks" tab then select the world you want to edit from the dropdown. I recommend you use the "Remove Row" button to remove all of the existing info for the world you have selected. Next you will want to add a new row for each course node in your model file. In the ID column you will want to increment the number for each row, starting from 0. In the Node Name column you should add the name of each of your level nodes. You will also want to add additional rows if you used any junctions or star coin gates, adding the appropriate names in the Node Name column. 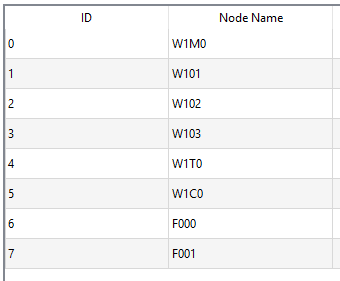 Next you will want to fill out the node and path unlocks, these are the nodes and paths that will be revealed when beating a level. You can also do the same for the secret node and path unlocks, these being the nodes and paths revealed upon getting the secret exit of a level. If you wish to have multiple paths or nodes unlocked at once, surround these with quotation marks, and separate them with a comma.  If your map contains junction nodes you will want to make it so the player stops when passing over them, to do this add the "stop" flag to the node flags for each junction. 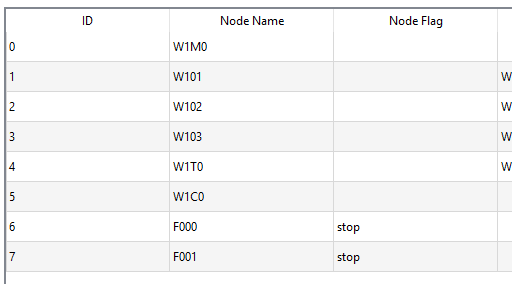 If you want the minimap to show certain paths before they are unlocked, you will want to add them to the Revealed Path Connections column. 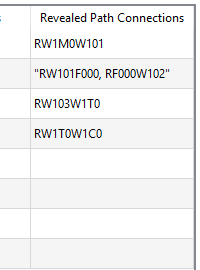 Configuring PathsTo configure paths you will want to select the "Path Settings" tab then select the world you want to edit from the dropdown. I recommend you use the "Remove Row" button to remove all of the existing info for the world you have selected. Next you will want to add a new row for each non corner route node in your model file. In the Path column you will want to add the name of one of the routes in your bone structure, do this for all routes that do not contain corners. 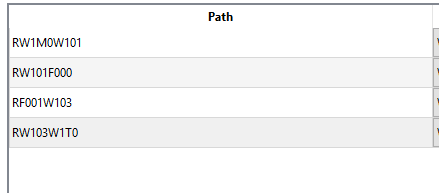 If you have a path that contains corners you will need to add two new rows. In one of these you should add a route that is named RNODE1K00y, and in the other you will name it RK00yNODE2. For example this bone structure would form these entries: 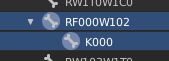 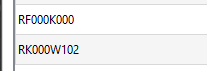 Configuring Koopaling PathsTo configure koopaling paths you will want to select the "Boss Path" tab then select the world you want to edit from the dropdown. I recommend you use the "Remove Node" buttons to remove the existing data. Next you will want to add the names of each of the nodes the Koopaling will run to. 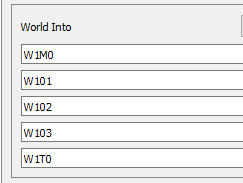 |
Pages: 1