Pages: 1
| luckwii |
Posted on 10-10-11, 01:33 pm in Activator tutorial (rev. 10 by
|
 Buster Beetle Buster Beetle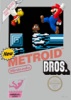 Karma: 379 Posts: 329/464 Since: 06-29-11 |
It appears that sprites are started and stopped similar to a short movie being played. The get started with an activator, play, and can get stopped by an activator or stopped by reaching their end. Looking at them this way seems to be the most likely IMO, and will help understand how to use them. It will also hopefully make the descriptions in the sprite database easier to understand. A lot of these are very complicated and have a lot of if, ands, and whens. If you are making a series of activator sprites making up a logic map may help when programming what you want them to do. I do not recommend copy and pasting activators as this will transfer unwanted data to the next sprite created.
I will continue to add to this tutorial. If anyone finds info that is contrary to this post, please reply and explain what you have found. This is all theory, and this thread will be updated as more is known. Input ID An input ID is what a sprite uses to receive its start/stop command. When you set an ID of 0, it tells the sprite to not look for an ID. Any number past that, and the sprite will wait to see this ID # coming from another sprite before being able to be used. The other sprite must send out this number in an output ID. If you set an input ID other than zero, the sprite you are editing will wait for this ID before doing what you programmed it to do. Output ID An output ID is what a sprite uses to send a start/stop command to another sprite. When you set it to 0, it will not send a command to another sprite. Any number past will send out the ID # you entered. This will be received by any sprite that shares this when their input ID is set to the same number. Start This starts the sprite animation, activation, or whatever the sprite is intended to do. Depending on the settings, the sprite may stop when finished, or may continue until it is told to stop. Check the settings of the sprite for what it does once started. Giving a second start command to the same sprite ID in most cases will not do anything. In some cases it will re-start the sprite again. Stop This stops the sprite from playing. Some sprites such as those with timers will do this automatically. Others do not stop until told to stop. Giving a second stop command to a sprite that is already stopped in most cases will not do anything. Physical contact Switches 34 Red Coin Ring 41 Bowser Battle Switch 66 P-Switch 88 Brick With P-Switch 107 ? Switch 108 Red ! Switch 110 Brick with Red ! Switch 235 Star Coin 152 Start/Stop Switch 291 Brick Block with ? Switch Switches can start/stop IDs. Physical contact switches must be hit by Mario to be activated. They can all send out start/stop commands to other sprites. Most of them can receive input commands from other sprites as well. Timed switches will reset to the opposite command when the timer runs out. Programmable Logic controllers 46 Spiked Ball Activator 164 Input Controller "And" (If X and Y, do Z) 165 Input Controller "Or" (IF X or Y, do Z) 166 Random Output Controller (If X, do Y or Z) 167 ID Count Up Controller 168 Zone Activation Switch 197 Tile Creator/Destroyer 286 ID Count Down Controller These are basically switches that do not need physical contact to activate and can be programmed to do various things. They can send out multiple commands, as well as receive multiple commands. These can be very complicated, and will take some time and experience to understand and use. |
| luckwii |
Posted on 10-10-11, 02:20 pm in Activator tutorial
|
|
Buster Beetle Karma: 379 Posts: 330/464 Since: 06-29-11 |
I will add more detail as I find it. I am testing activators today, so I haven't gone into detail yet with them....the data may change. In fact, this tutorial will continue to change as more is found in the future.
|
| luckwii |
Posted on 07-09-11, 06:51 am in Tileset Editing FAQ and How-to's (rev. 2)
|
|
Buster Beetle Karma: 379 Posts: 49/464 Since: 06-29-11 |
Found two new cool behaviors.
00 00 00 84 - top of ladder/vine (solid on top, climbable from bottom) 0C 00 00 88 - solid bottom and sides, fall through from top (kind of a one way tile) |
| luckwii |
Posted on 07-09-11, 03:48 pm in New Metroid Bros. (rev. 2 by ImageBot on 11-21-16, 02:08 am)
|
|
Buster Beetle Karma: 379 Posts: 56/464 Since: 06-29-11 |
Seventh and FINAL Beta released
New Metroid Bros. (.145) Featured in 7th Beta....Metroid Fusion X Parasites!  Screenshots         I am using a (U) rom. Use the included xdelta to patch a clean 32MB rom. Final release coming soon...Much more ahead! The final World is amazing, you will not believe it until you see it. |
| luckwii |
Posted on 10-13-11, 07:46 am in implemented Unknown entrances 1,2,3, and 4 (mini mario connected pipes)
|
|
Buster Beetle Karma: 379 Posts: 346/464 Since: 06-29-11 |
In the entrance editor they are marked unknown. They are the ones at the bottom of the drop menu.
Here are the values. Unknown 1 = Mini Mario connected pipe facing up. Unknown 2 = Mini Mario connected pipe facing down. Unknown 3 = Mini Mario connected pipe facing left. Unknown 4 = Mini Mario connected pipe facing right. |
| luckwii |
Posted on 11-14-11, 10:12 pm in Camera view problems (rev. 2)
|
|
Buster Beetle Karma: 379 Posts: 382/464 Since: 06-29-11 |
Posted by MarioSunshine Thanks! Now I get it.  But, what about the others? (camera top/bottom offset and camera top/bottom offset special) Picture a 4 by 4 tile (64 pixel) box in the middle of the DS screen. The outer line of this box is the default position where the game sees Mario, and scrolls the camera. Changing the offsets will move this point up or down. The top offset is where Mario has to make contact with the top line to start the camera moving upward. The opposite is true for the bottom offset. The "special" offsets are used when Mario is on a vine, and other sprites that will disable the normal camera scroll. I have not researched what all the sprites are that can do this, but the vine is one for sure. The values are measured in pixels, and are positive or negative. Remember one tile is 16 pixels, so multiples of 16 will be tile distance. So increasing the top offset numerically/positive will make the camera start to scroll closer to the center of the screen. Negative/decreasing numbers will start the camera scroll closer to the top of the screen, delaying the camera scroll. For the bottom offset, positive/increasing the number will start the camera scrolling later (farther from center). Negative/decreasing it will start the scroll closer to the center of the screen. |
| luckwii |
Posted on 11-29-11, 06:00 am in Loading backgrounds from view (rev. 3 by ImageBot on 11-21-16, 02:09 am)
|
|
Buster Beetle Karma: 379 Posts: 406/464 Since: 06-29-11 |
I am trying to figure out the unknown1, unknown2A, and unknown3A.
So far I have found where the edit in the block data. They change block 8 nybbles 28, 29, and 30. unknown1 will disable the bottom layer with value 1 unknown2 (A) I don't know... unknown3 (B) will disable the top layer background These are hit or miss though. Sometimes they work well. But sometimes they will affect or corrupt the background of the next view you go to. Dirbaio, knowing what block these edit, block 8, do you have any ideas on figuring these out? A good way of seeing the changes is disabling the main BGs in the tool option in Desmume. You can strip the layers down with these. These are the nybbles with all 0 values, but I highlighted the nybbles that will change. 
|
Pages: 1