- NSMBHD
- Member list
MeroMero
- +1'd posts
|
|
Posted on 05-01-13, 06:21 pm in 24 levels (beta 4) New Super Mario Bros For Super Players (rev. 27 by
|
|
Death by cuteness
 Karma: 6564 Posts: 1/598 Since: 05-01-13 |
UPDATE : beta 4 available
Hi everyone, I'm maybe new to this forum but not necessarily in hacking. Anyway I present my hack, New Super Mario Bros For Super Players (NSMBFSP to make it short). Why the acronym For Super Players ? _Well I was in a dire need to find a name for my hack, I knew that the japanese version of Super Mario Bros 2 (the real one) got renamed Super Mario Bros The Lost Levels when it got internationally released on Super Mario All-Stars (SMAS), oh crap NSMB The Lost Levels was already taken, hmm... But then I remembered the japanese version of SMAS (called Super Mario Collection btw), and that SMB2 got renamed Super Mario Bros 2 For Super Players. You can say that this hack aims to be to NSMB what SMB2 was to SMB (and no NSMB2 doesn't count). 24/80 levels done : Some screenshots to see the overall look of my hack. Some videos as well, because why not ? Hack's features : _Addition of a 4th pipe color (blue, glitch-free); _End-of-level castle are now in NSMBWii / post NSMBWii style; _Grey End-of-level castle for secret exits (with correct behavior to boot); _Mini-mushroom / Blue shell / Mega-mushroom / Spring spawned from Brick Block; _Mega-mushroom spawned from Invisible Block; _Spinning Logs were completely revamped; _Sprites/Objects that synergize well with each other AND team up well against Mario/Luigi (think for example of a level filled with Scale Platforms and ... Sledge Bros !) Download patch (EUR, not US) NOTES : Initially I wanted to make the hack public only when it would be fully finished, but I eventually realized that I was dragging this for too long so I'm releasing a beta now. All tilesets and backgrounds in this hack are free for use. CREDITS (you'll see, I'm NOT good with giving credits): Dirbaio, Treeki (and everyone who participated / is still participating) for NSMB editor, me for the levels. |
|
|
Posted on 07-01-16, 03:34 pm in asm Title logo with 256 colors (rev. 5 by
|
|
Death by cuteness
Karma: 6564 Posts: 442/598 Since: 05-01-13 |
Have you ever wondered if it was possible to make a title logo with 256 colors?
Well I sure did, and here it is: Title logo with 256 colors: nsub_0200A4D4:
B 0x200A4D8 @Disable titlescreen cutscene by Skawo
repl_020CDD94_ov_09:
STMFD SP!, {LR}
BL 0x20099C8 @Load Title Logo on extended palette mode
LDR R0, =0x20DB9F4 @Factory for changing the OAM properties of the title logos
MOV R1, #0
SUB R1, R1, #1
MOV R2, #0
STR R1, [R0], #4
ADD R2, R2, #1
CMP R2, #0x16
ADDEQ R0, R0, #0x44
ADDEQ R2, R2, #0x11
CMP R2, #0x29
ADDEQ R0, R0, #0x40
ADDEQ R2, R2, #0x10
CMP R2, #0x3D
SUBCC PC, PC, #0x2C
LDR R0, =0x20DB9F4
ADD R0, R0, #0xA4
MOV R2, #0
MOV R1, #0x2000
CMP R2, #4
ADDGE R1, R1, #0x40
CMP R2, #8
SUBGE R1, R1, #0x28
ADD R1, R1, #0xB8
STR R1, [R0], #8
ADD R2, R2, #1
CMP R2, #8
SUBEQ R0, R0, #0x68
CMP R2, #0xC
SUBCC PC, PC, #0x34
LDR R0, =0x20DB9F4
ADD R0, R0, #0xA6
MOV R1, #0x100
ADD R1, R1, #0x71
MOV R2, #0
CMP R2, #4
ADDEQ R1, R1, #0x100
MOV R1, R1, LSL #0x17
MOV R1, R1, LSR #0x17
ORR R1, R1, #0xC000
STRH R1, [R0], #8
ADD R1, R1, #0x40
ADD R2, R2, #1
CMP R2, #8
SUBCC PC, PC, #0x2C
LDR R0, =0x20DB9F4
ADD R0, R0, #0x7E
MOV R1, #0x100
ADD R1, R1, #0x88
MOV R2, #0
MOV R1, R1, LSL #0x17
MOV R1, R1, LSR #0x17
ORR R1, R1, #0xC000
STRH R1, [R0], #8
ADD R1, R1, #0x40
ADD R2, R2, #1
CMP R2, #4
SUBCC PC, PC, #0x24
LDMFD SP!, {PC}
repl_020CDD88_ov_09:
LDR R0, =0x20DB9F4
ADD R0, R0, #0xA8
MOV R1, #0
LDR R2, =0x2087710
LDR R2, [R2]
MOV R2, R2, LSR #7
STR R2, [R0], #8
ADD R2, R2, #0x20
ADD R1, R1, #1
CMP R1, #8
SUBEQ R0, R0, #0x68
CMP R1, #0xC
SUBCC PC, PC, #0x20
LDR R0, =0x778
BX LR This is best used when the the titlescreen cutscene is disabled. I could have changed the OAM properties of the other logo but it's much simpler that way. As always this thread is really useful for those who can't get the ASM-Template working. Normally I should have covered all the possible bugs, but in the event that a sneaky one managed to get under my radar, here is an alternate solution: _IF the title screen appears scrambled, delete the 3rd function in the ASM patch (repl_020CDD88_ov_09: and below) and save again the .s file; _Decompress overlay 9 if not already decompressed and at offset 0xF790 paste the following: D02088C100010000 D020C8C120010000 D02008C040010000 D02048C060010000 FFFFFFFFFFFFFFFF B82071C100000000 B820B1C120000000 B820F1C140000000 B82031C060000000 F82071C180000000 F820B1C1A0000000 F820F1C1C0000000 F82031C0E0000000 The second solution is bug free, but I'll have it as the main - and only - solution only if the first one happens to be glitchy (which I hope not). Images: The new OAM properties make the code read the title logo picture as chunks of 64×64 pixels, and there are 16 of them. This means that only pictures with 65536 pixels are allowed. I could have used a 256×192 pixels large image but to stay on the safe side I wanted to use an image that would give a total area that can be written as a power of 2: _which is the case of 65536 (216) _which is NOT the case of 49152 (or 256×192) For example let's say you want to use the Beta title logo:  First delimit the 16 parts: 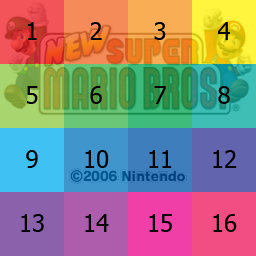 You won't need squares 13 to 16. Open your image in Photoshop or GIMP. If you want the logo to appear in the screen exactly as in the original image, follow this advice: _no matter what the output image must be in a 64×1024 format (64 pixels long and 1024 pixels high). _realistically only 64×768 will be needed since 64×768 is the same as 256×192, which is the number of pixels of a NDS screen. This is where you would place each of the 16 parts in this new format:   Remember, each chunk is a 64×64 square. Save the image and exit you Picture Editing software. In NSMB Editor: _go to ROM File Browser > FILESYSTEM > root > ARCHIVE > mg_entry.narc > FILESYSTEM > root > mg_entry and extract d_2d_mgvs_bg_title_ncg.bin. _this image meets the 2 necessary requirements, it is a 8bpp image AND is 256×256 in size. _then go to ROM File Browser > FILESYSTEM > root > ARCHIVE > menu_title.narc > FILESYSTEM > root > menu > title and extract UE_title_ncl.bin. _now go to ROM File Browser > FILESYSTEM > root > uiStudio and import d_2d_mgvs_bg_title_ncg.bin into UI_O_menu_title_logo_o_u_ncg.bin and UE_title_ncl.bin into d_2d_UI_O_menu_title_logo_o_u_ncl.bin respectively. Now you can open both d_2d_UI_O_menu_title_logo_o_u_ncl.bin and UI_O_menu_title_logo_o_u_ncg.bin located in the uiStudio folder. Before importing your image in the new format, make sure View in 4bpp format is NOT ticked since you actually want to import the image in 8bpp. Now change Tile Width from 32 to 8, and only then you can import by clicking Import all bitmaps with all palettes and finally Save all. 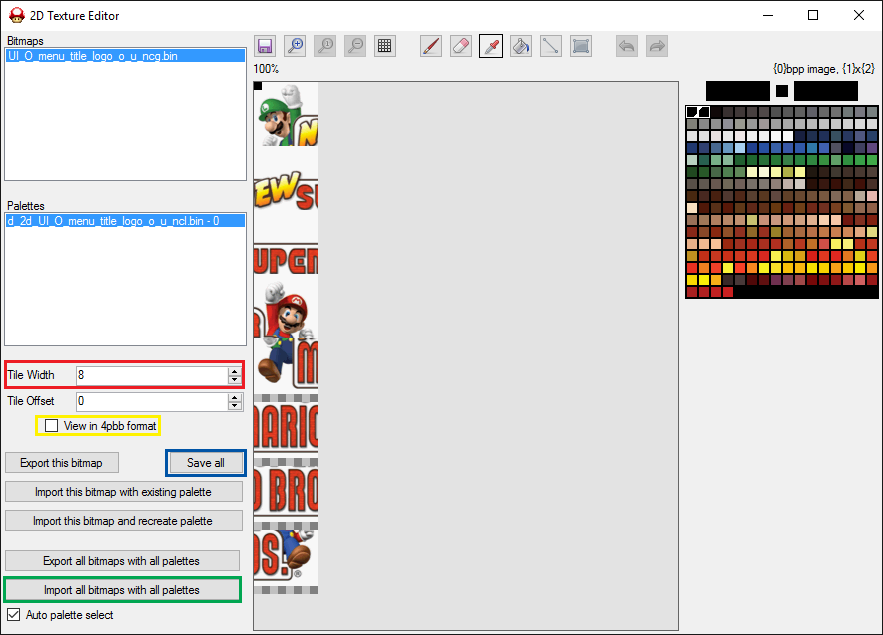 In-game: 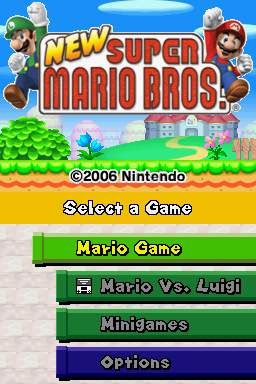 The video comes from an older version of the mod. Enjoy! |
|
|
Posted on 07-12-16, 04:21 pm in tutorial Edit world-map icons (rev. 1 by
|
|
Death by cuteness
Karma: 6564 Posts: 462/598 Since: 05-01-13 |
Step 1:
Open your NSMB ROM in NSMB editor. Step 2: Go to ROM File Browser -> FILESYSTEM -> root -> uiStudio. Step 3: Before proceeding any further, extract the file UI_O_1P_course_select_u_ncg.bin, you'll see later why you need to do this step. Step 4: Double-click on the file UI_O_1P_course_select_o_ud_ncl.bin to open the Palette Viewer. Tick 16 Color on the bottom-left, and click Add all. Step 5: You can close the Palette Viewer, then double-click on UI_O_1P_course_select_u_ncg.bin. Step 6: On the 2D Texture Editor window, click on View in 4 bpp format. Set Tile Width to 24. Click on Export this bitmap. Step 7: Open the image you exported in Step 6 with Photoshop, GIMP or another Image editor. Step 8: Now that the image is opened, click Ctrl+A (which is usually the shortcut for Select All) and click Del. This will completely erase the image, but not the template, which is what we need. Step 9: Now fetch your custom World Icons (who must be 32×32 in size, regardless of transparency), and copy them in the image template with the following line-up: _Duo 1: W1 with W8 _Duo 2: W2 with W6 _Duo 3: W3 with W4 _Duo 4: W5 with W7 Not only that but to ease the workload, group them in such a way that you can delete the 3 other duos in one single selection, something like this for example:  Step 10: Select duos 2, 3 and 4 and click Del, then Ctrl+S (which is usually the shortcut for Saving) On NSMB editor, select palette 5, then click on Import this bitmap and recreate palette to import the image you just saved on Photoshop. Step 11: Now go back to Photoshop, and click Ctrl+Alt+Z (which should Undo the last action). Repeat step 11 but with duos 1, 3 and 4 this time. Then once you're done you will have to repeat this operation twice more, for duos 1, 2 and 4 and for duos 1, 2 and 3. When you import the remaining duo, keep in mind the palettes you want to overwrite: _Duo 1: palette 5 _Duo 2: palette 4 _Duo 3: palette 6 _Duo 4: palette 7 Step 12: You can click Save all and exit the Tilemap Editor. Go to file UI_O_1P_course_select_u_ncg.bin and click replace to re-import the file you extracted in step 3. Step 13: Repeat Step 4. Step 14: You can close the Palette Viewer, then double-click on UI_O_1P_course_select_d_nce.bncd. Step 15: Click on View in 4 bpp format. Step 16: Now locate each of the World Icons, and click Import this bitmap with existing palette, as a reminder: _W1: palette 5 _W2: palette 4 _W3: palette 6 _W4: palette 6 _W5: palette 7 _W6: palette 4 _W7: palette 7 _W8: palette 5 Step 17: Click Save all and exit the Tilemap Editor. Step 18: In DeSmuMe: 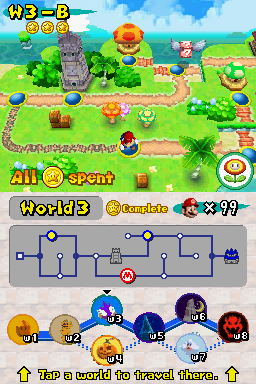 The World Icons from |
|
|
Posted on 03-02-16, 11:31 pm in guide Tilesets and backgrounds name table (rev. 3 by
|
|
Death by cuteness
Karma: 6564 Posts: 368/598 Since: 05-01-13 |
This table here will allow you to find quickly which slot hosts which background or tileset, use it wisely.
The files listed in this table all begin with d_2d_ and are located either in BG_ncg folder (for the graphics) or BG_ncl folder (for the palettes). 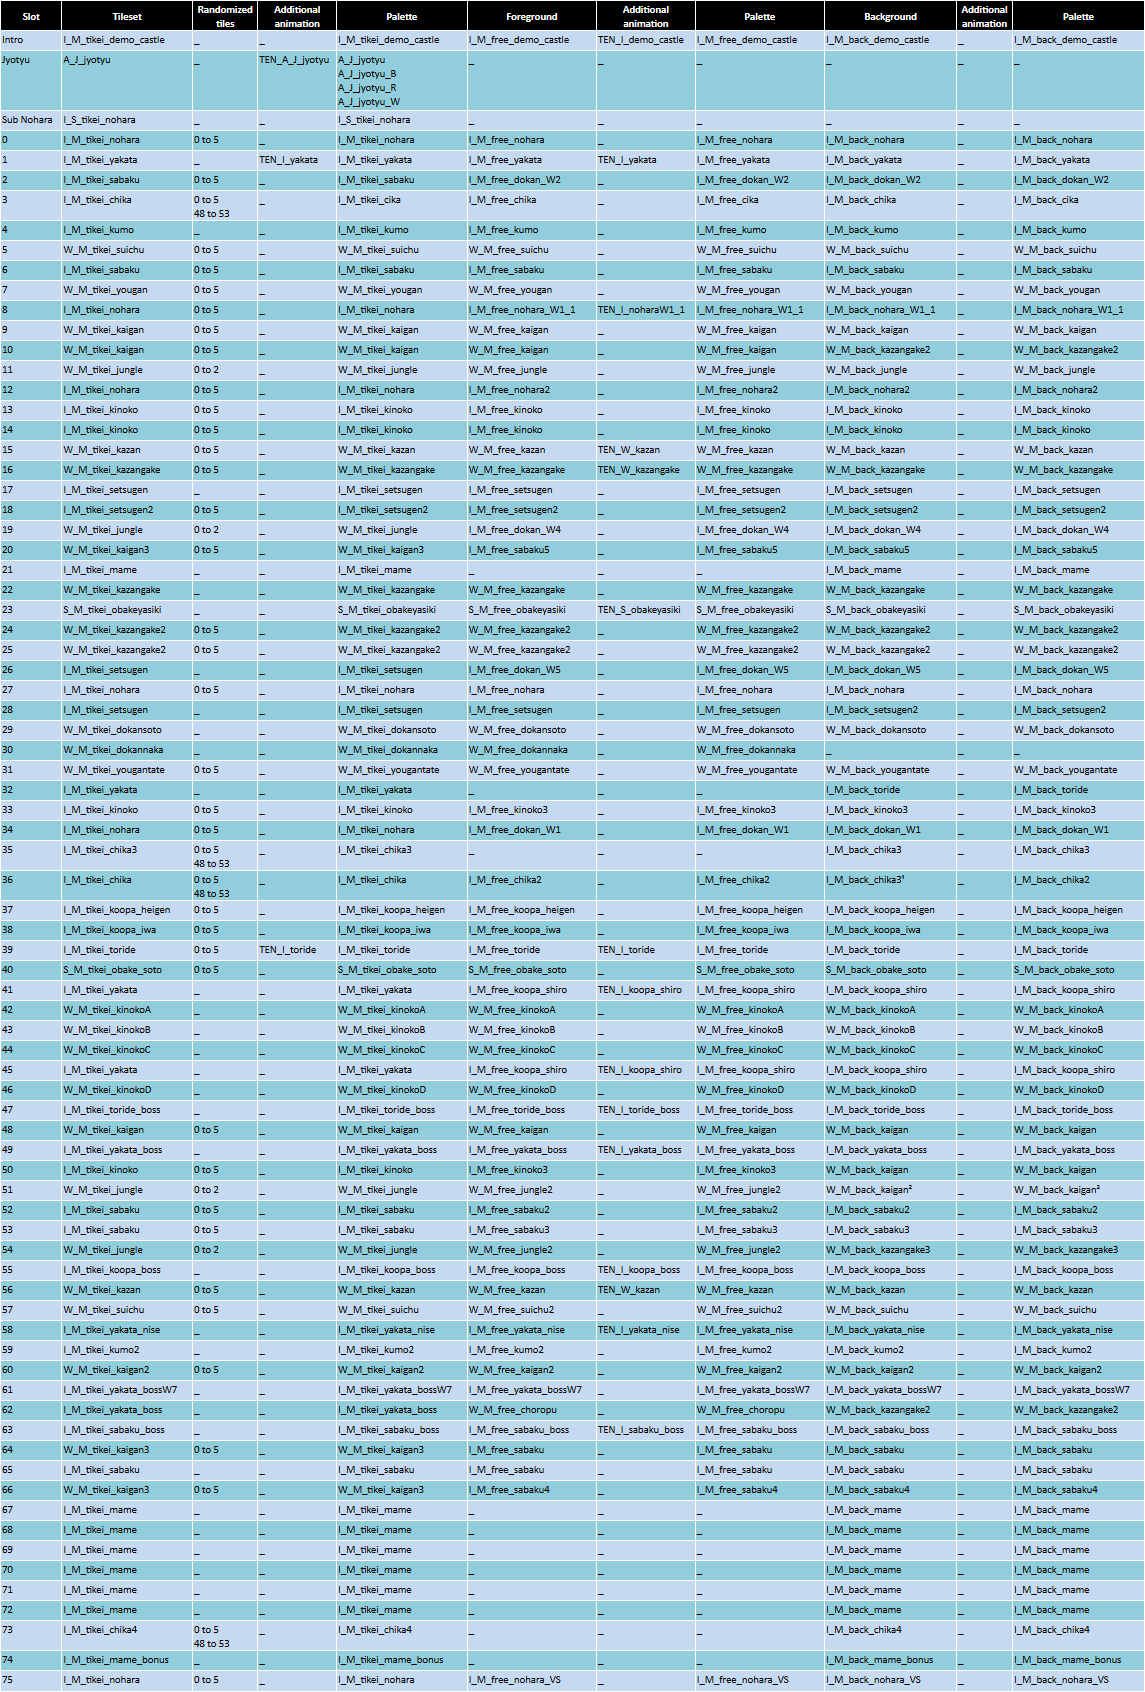 ¹ It should be I_M_back_chika2 for Background 36, look at this thread to fix this. ² It should be W_M_back_jungle2 for Background 51, look at this thread to fix this. |
|
|
Posted on 07-05-16, 10:09 pm in download ASM Hacks ready for importing (rev. 8 by
|
|
Death by cuteness
Karma: 6564 Posts: 451/598 Since: 05-01-13 |
NSMB (U) ASM Archive.zip
Oh that? This is the result of a PM conversation. Simply put you can say that this is a portable ASM-Template! How to use? Just copy the source folder directly in the ASMPatchTemplate-Master folder, and you're ready to import all those ASM Hacks in your game. As a bonus there is a xDelta patch in there too, so that you can then export all the files below to your hacked ROM. Some files are necessary to get due to some of those ASM patches (those in red). The archive also comes with xdeltaUI, as well as a modified version of NSMBe with 3 new elements:
The xDelta patch (US version), once applied, will modify:
as well as the following files:
It will also add 3 new folders!
Are present in the source folder:
All the contents present in the "source" folder must be put in the eponymous folder in the ASMPatchTemplate-Master. First apply the xDelta patch with xDelta UI, no questions asked, and only then you can do a "Run 'make' and insert" with NSMB editor to import the ASM hacks you want. Note that the source folder must contain the file named "nsmb.h" that you should already have if you use the ASM-Template to begin with. Also the ASM hacks in red MUST be present due to some necessary files being modified by the xDelta patch. For obvious reasons, the xDelta patch must be applied on a clean ROM. But if you wanted to apply the modified files on a heavily modified ROM, then just patch a clean ROM and export all the necessary files to your modded ROM. For the beginners: if for some reason you can't "Run clean" or "Run make and insert" with NSMB editor even after having installed DevkitPro, open the Makefile in Notepad(++) and go to line 79 to delete -lgcc, then it should work cleanly. NEW: If you want all 31 ASM Hacks, good news! There's also a xDelta patch that comes with all the mods incorporated in the source folder! Oh and before you ask, all of those hacks were tested on a NDS Lite! Now you can go crazy! |
|
|
Posted on 09-14-13, 03:19 pm in Sound set list (rev. 6 by
|
||||||||||||||||||||||||||||||||||||||||||||||||||||||||||||||||||||||||||||||||||||||||||||||||||||||||||||||||||||||||||||||||||||||||||||||||||||||||||||||||||||||||||||||||||||||||||||||||||||||||||||||||||||||||||||||||||||||||||||||||||||||||||||||||||||||||||||||||||||||||||||||||||||||||||||||||||||||||||||||||||||||||||||||||||||||||||||||||||||||||||||||||||||||||||||||||||||||||||||||||||||||||||||||||||||||||||||||||||||||||||||||||||||||||||||||||||||||||||||||||||||||||||||||||||||||||||||||||||||||||||||||||||||||||||||||||||||||||||||||||||||||||||||||||||||||||||||||||||||||||||||||||||||||||||||||||||||||||||||||||||||||||||||||||||||||||||||||||||||||||||||||||||||||||||||||||||||||||||||||||||||||||||||||||||||||||||||||||||||||||||||||||||||||||||||||||||||||||||||||||||||||||||||||||||||||||||||||||||||||||||||||||||||||||||||||||||||||||||||||||||||||||||||||||||||||||||||||||||||||||||||||||||||||||||||||||||||||||||||||||||||||||||||||||||||||||||||||||||||||
|
Death by cuteness
Karma: 6564 Posts: 32/598 Since: 05-01-13 |
This is the sound set list.
Are only listed the sound sets who can handle at least groups 0 and 1 sounds. Note 1 : sound set 6 should only be used in VS mode. Note 2 : if the playing music use too much channels, some sounds may be scrapped (which is what happens with sound set 42(2A) for example, both spiked balls and castle sounds play with the Tower theme but spiked balls become mute with the Castle and Overworld themes). The names as well as the order of the groups are only suggestive.
Note that some sounds may still not be ranked, but hopefully the sound set list will come one step closer to being completed. |
|
|
Posted on 07-28-14, 11:40 am in tutorial Restoring bottom background in slot 36 (rev. 2 by
|
|
Death by cuteness
Karma: 6564 Posts: 103/598 Since: 05-01-13 |
Restoring the stalactites background
Step 1 : Open the NSMB-Editor Step 2 : Go into "ROM File Browser" tab and look at overlay9_0.bin size: If it's over 200,000 bytes, proceed directly to step 6. Else if it's only around 120,000 bytes, then : Step 3 : Go into "Tilesets" tab and open Tileset 0 (Jyotyu) : Step 4 : Save without modifying anything and close the Tileset tab : What you just did here is decompressing the overlay9_0.bin so that it's over 200,000 bytes. Step 5 : Now you can go back to "ROM File Browser". Step 6 : Open overlay9_0.bin with the Hex editor : Step 7 : Go to the following offset : 0×30E04 (US)
0×30204 (JP)
0×30618 (EU)
0×302C4 (KS)
0×302C4 (CH) Step 8 : Now change : 6A 00 06 C1 into 69 00 00 00 for non-European versions; B5 00 06 C1 into B4 00 00 00 for European versions. (It seems that changing 00 06 C1 into 00 00 00 doesn't yield any noticeable changes though.) Step 9 : Save and Exit the Hex Editor. Step 10 : Close NSMB-Editor so that the changes are registered and open it again. Step 11 : Now go to "Backgrounds" tab and open BOTTOM 36 : And voilà ! You just restored the Stalactites background. Explanation : The bottom background on slot 36 used the right ncl but the wrong ncg (precisely the same as the background on slot 35), hence its broken appearence. What you did is replacing the ncg loaded for that slot (d_2d_I_M_back_chika2_ncg.bin instead of d_2d_I_M_back_chika3_ncg.bin) so that bottom background 36 is loaded correctly. But there's a catch, for whatever tileset you're using, make sure that the 6th row of said tileset is completely empty, like this : otherwise the background will glitch and you'll be better off using another background. EDIT : You can do it on Chinese versions too, but you'll have to use an older revision to decompress the overlay9_0 using the "Decompress overlay" button (I used revision b356). |
|
|
Posted on 04-20-15, 05:44 pm in Misc. patches thread (rev. 8 by
|
||||||||||||||||||||||||||||||||||||||||||||||||||||||||||||||||||||||||||||||||||||||||||||||||
|
Death by cuteness
Karma: 6564 Posts: 292/598 Since: 05-01-13 |
Here are the overlays for those who want them:
Stop timer: overlay 0 Always play as Luigi: overlay 9 Don't switch screen even if entrance set to (imperfect) overlay 54 (first one) overlay 10 (second one) Disable challenge mode: overlay 8 (both) Change the amount of fireballs Bowser Jr. can withstand from 8 to 18 (NSMBW style) overlay 28 Make groundpounds deal the same amount of damage as normal jumps to Bowser Jr. (partial) overlay 28 Change what world Mario will be sent to upon clearing a castle: overlay 8 EDIT: This is an update about the world progression: Overlay 8
|
|
|
Posted on 07-14-16, 08:16 pm in asm Each Area has its own graphics (rev. 2 by
|
|
Death by cuteness
Karma: 6564 Posts: 466/598 Since: 05-01-13 |
Are you always fearing that you might be short of slots for tilesets, or backgrounds?
Have you ever wanted to be able to have quicksand no matter the tileset? Then you knocked at the right door! Here comes my NSMB masterpiece! Download on this post to centralize all the updates in one post should the link be updated again! Apply the NSMB (U) Tileset.xdelta to get all the latest improvements made to the game! You probably won't need it anyways, but for good measure here is the ASM Hack that allows me to do this: Dedicated Tilesets and Backgrounds per Area, NSMB U Style: repl_020AF9C4_ov_00:
STMFD SP!, {LR}
BL .VisualCourseFolder
LDMFD SP!, {PC}
repl_020BD088_ov_00:
STMFD SP!, {LR}
BL .VisualCourseFolder
ADD R0, R0, #1
LDMFD SP!, {PC}
repl_020B84EC_ov_00:
STMFD SP!, {LR}
BL .VisualCourseFolder2
ADD R2, R0, #2
LDR R0, =0x7A5
LDMFD SP!, {PC}
repl_020B8518_ov_00:
STMFD SP!, {LR}
BL .VisualCourseFolder2
ADD R0, R0, #2
LDMFD SP!, {PC}
repl_020BCFF4_ov_00:
STMFD SP!, {LR}
BL .VisualCourseFolder
ADD R0, R0, #3
LDMFD SP!, {PC}
repl_020BCC78_ov_00:
STMFD SP!, {LR}
BL .VisualCourseFolder
ADD R0, R0, #4
LDMFD SP!, {PC}
repl_020BCD4C_ov_00:
STMFD SP!, {LR}
BL .VisualCourseFolder
ADD R0, R0, #5
LDMFD SP!, {PC}
repl_020BCCE8_ov_00:
STMFD SP!, {LR}
BL .VisualCourseFolder
ADD R0, R0, #6
LDMFD SP!, {PC}
repl_020BC904_ov_00:
STMFD SP!, {LR}
BL .VisualCourseFolder2
ADD R8, R0, #7
LDMFD SP!, {PC}
repl_020BCA50_ov_00:
STMFD SP!, {LR}
BL .VisualCourseFolder2
ADD R8, R0, #8
LDMFD SP!, {PC}
repl_020BB9B0_ov_00:
STMFD SP!, {LR}
BL .VisualCourseFolder
ADD R0, R0, #9
LDMFD SP!, {PC}
repl_020B3A60_ov_00:
STMFD SP!, {LR}
BL .VisualCourseFolder2
ADD R0, R0, #0xA
LDMFD SP!, {PC}
repl_020B3A3C_ov_00:
STMFD SP!, {LR}
BL .VisualCourseFolder
ADD R0, R0, #0xB
LDMFD SP!, {PC}
.VisualCourseFolder:
STMFD SP!, {LR}
LDR R1, =0x2085A94
LDRH R1, [R1]
MOV R0, #0xC
MUL R1, R0, R1
LDR R0, =0x7A6
ADD R0, R0, R1
LDR R1, =0x7A5
LDMFD SP!, {PC}
.VisualCourseFolder2:
STMFD SP!, {R1, LR}
LDR R1, =0x2085A94
LDRH R1, [R1]
MOV R0, #0xC
MUL R1, R0, R1
LDR R0, =0x7A6
ADD R0, R0, R1
LDMFD SP!, {R1, PC} What does this do concretely? Basically you'll be able to have 1 tileset, foreground and background per Area. There are 12 files per Area, times 185 for a total of 2220 files! Those are the 12 files for each Area:
xxx being the Area Number beginning with 001. This is not much but I made the extra effort to port all the original Tileset/BGs used in each of the 185 Areas so that you can still play the base game. Also this Hack uses and abuses the Tile-Share method, in fact the BG .ncg is the same for both FG and BG! All in all this means you can let your creativity explode, since you're not confined anymore by restrictions. Does this means that those 3 parameters are now useless? 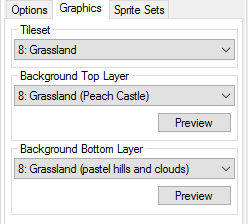 NO! All 3 of them are still useful: The Tileset allows you to load the textures (or Conveyor Belts) for Tileset Numbers who allows them. The Foreground allows you to load the extra animations (TEN). The Background allows you to choose the Jyotyu palette, as well as whether or not you want to load the Boss music on Level Start. FG/BG animations are still tied to the FG/BG Slot Number! On a side note: This will finally allow me to properly answer this: Posted by skawo That's interesting, but it doesn't seem to happen in the US version? I didn't leave my first added file empty and it's quite happily loading. LDR R1, =0x7A5 |
|
|
Posted on 08-01-16, 10:22 am in Misc. patches thread
|
|
Death by cuteness
Karma: 6564 Posts: 507/598 Since: 05-01-13 |
The code loads after the Level Intro.
NSLU physics for Luigi: repl_0215EAD4_ov_36:
STMFD SP!, {R2-R9, LR}
MOV R0, R5, LSL R9
LDR R2, =0x2085A50
LDRB R2, [R2]
LDR R3, =0x212E2D8
CMP R2, #1
LDRNE R4, =0x3A80
MOVNE R5, #0x90
MOVNE R6, #0xB0
MOVNE R7, #0x80
MOVNE R8, #0x60
MOVNE R9, #0x180
LDREQ R4, =0x4080
MOVEQ R5, #0x60
MOVEQ R6, #0x78
MOVEQ R7, #0x54
MOVEQ R8, #0x40
MOVEQ R9, #0x100
STR R4, [R3]
STR R4, [R3, #0x40]
STR R4, [R3, #0x80]
STR R5, [R3, #0xE0]
STR R5, [R3, #0x100]
STR R6, [R3, #0xE4]
STR R6, [R3, #0x104]
STR R7, [R3, #0xE8]
STR R7, [R3, #0x108]
STR R8, [R3, #0xEC]
STR R8, [R3, #0x10C]
STR R9, [R3, #0xFC]
LDMFD SP!, {R2-R9, PC} |
|
|
Posted on 12-22-14, 08:39 pm in Outer Super Mario Bros: OSMB
|
|
Death by cuteness
Karma: 6564 Posts: 187/598 Since: 05-01-13 |

Arceus used It's super effective ! Newsuperhackboys Arceus gains 606 Exp. points. |
|
|
Posted on 07-04-16, 08:00 pm in Rips from Newer NSMB Titles (rev. 2 by
|
|
Death by cuteness
Karma: 6564 Posts: 447/598 Since: 05-01-13 |
NSMBWii Jyotyu tileset is a recurring request by folks there, so wait no longer and grab all the necessary files below!
NSMBWii Jyotyu tileset! Tileset  NSMB editor -> Tilesets -> Tileset 0 (Jyotyu) and click Import to import this file: jyotyu.nmt You will also need to import the palettes separately since the .nmt will only update the default jyotyu palette: NSMB editor -> ROM File Browser -> FILESYSTEM -> root -> BG_ncl -> d_2d_A_J_jyotyu_B_ncl.bin NSMB editor -> ROM File Browser -> FILESYSTEM -> root -> BG_ncl -> d_2d_A_J_jyotyu_ncl.bin NSMB editor -> ROM File Browser -> FILESYSTEM -> root -> BG_ncl -> d_2d_A_J_jyotyu_R_ncl.bin NSMB editor -> ROM File Browser -> FILESYSTEM -> root -> BG_ncl -> d_2d_A_J_jyotyu_W_ncl.bin Animated blocks  NSMB editor -> ROM File Browser -> FILESYSTEM -> root -> BG_ncg -> d_2d_TEN_A_J_jyotyu_ncg.bin Animated blocks when being pressed from below 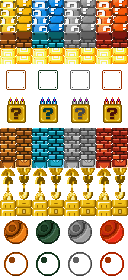 NSMB editor -> ROM File Browser -> FILESYSTEM -> root -> obj -> A_block_ncg.bin Broken blocks 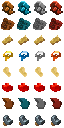 NSMB editor -> ROM File Browser -> FILESYSTEM -> root -> obj -> A_block_hahen_ncg.bin 1-up game blocks  NSMB editor -> ROM File Browser -> FILESYSTEM -> root -> obj -> I_minigame_block_ncg.bin You will also need to import the Donut Lift and the Door since those are present in the Jyotyu tileset: Donut Lift  NSMB editor -> ROM File Browser -> FILESYSTEM -> root -> obj -> A_tikuwa_block_ncg.bin Door  NSMB editor -> ROM File Browser -> FILESYSTEM -> root -> enemy -> W_tobira.nsbmd NSMB editor -> ROM File Browser -> FILESYSTEM -> root -> obj -> I_kakushitobira_ncg.bin Have fun  IMPORTANT: go there for the second and final part! Warning: ASM required! |
|
|
Posted on 07-05-16, 01:06 pm in asm Improved score graphics with custom colors for Luigi (rev. 1 by
|
|
Death by cuteness
Karma: 6564 Posts: 448/598 Since: 05-01-13 |
Another ASM Hack ?!
This one will allow you to double the area used for the score graphics with the exception of the 1-up whose area is used as a base for the other graphics to take from. Also Luigi now has its own set of colors, as seen in the image below: 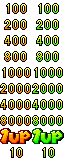 Download: I_score_l_ncg.bin Note that if you don't like those score graphics, you can always change them yourself. Improved score graphics: repl_020D8D0C_ov_08:
LDRB R2, [R0]
LDR R0, =0x216F8E8
LDRH R1, [R0, #4]
ANDS R1, R1, #0x100
ADDNE PC, PC, #0x8C
LDR R1, [R0]
STR R1, [R0, #-0xC0]
STR R1, [R0, #0x28]
STR R1, [R0, #-0x80]
STR R1, [R0, #-0x28]
STR R1, [R0, #-0x158]
STR R1, [R0, #0x20]
STR R1, [R0, #-0x70]
STR R1, [R0, #-0xF8]
STR R1, [R0, #-0x170]
ADD R0, R0, #4
MOV R1, #0
SUB R1, R1, #0x10000
ADD R1, #0x1000
CMP R2, #1
ADDEQ R1, #0x2000
STR R1, [R0, #-0xC0]
ADD R1, R1, #2
STR R1, [R0, #0x28]
ADD R1, R1, #2
STR R1, [R0, #-0x80]
ADD R1, R1, #2
STR R1, [R0, #-0x28]
ADD R1, R1, #2
STR R1, [R0, #-0x158]
ADD R1, R1, #2
STR R1, [R0, #0x20]
ADD R1, R1, #2
STR R1, [R0, #-0x70]
ADD R1, R1, #2
STR R1, [R0, #-0xF8]
ADD R1, R1, #2
STR R1, [R0]
ADD R1, R1, #2
STR R1, [R0, #-0x170]
BX LR
ADD R0, R0, #5
LDRB R1, [R0]
AND R1, R1, #0x1F
CMP R2, #1
ADDEQ R1, R1, #0x20
STRB R1, [R0, #-0xC0]
STRB R1, [R0, #0x28]
STRB R1, [R0, #-0x80]
STRB R1, [R0, #-0x28]
STRB R1, [R0, #-0x158]
STRB R1, [R0, #0x20]
STRB R1, [R0, #-0x70]
STRB R1, [R0, #-0xF8]
STRB R1, [R0]
STRB R1, [R0, #-0x170]
BX LR |
|
|
Posted on 05-13-13, 08:51 pm in suggestion Visual representation of sprites 84 and 245 (rev. 6 by
|
|
Death by cuteness
Karma: 6564 Posts: 9/598 Since: 05-01-13 |
Suggestion in the title already.
I know I may come as arrogant to ask you something like this because I'm a new member but it would be really neat if you could implement this (especially for the zoom since it is one of the most difficult sprite to understand and manipulate imo). Anyway I will share my finds. NOTE : All the units used here are in tiles (as a reminder 1 tile = 16 pixels). Sprite 245 first. Pretty easy here, the pump's position as well as its movement range are simplified by a 1x1 square (position) and a 16x16 square (range). (nybble 7=0, nybble 9=0) The black 1x1 square can take any of the 256 positions within that white 16x16 square. (nybble 7=1, nybble 9=0) The red 1x1 square can take any of the 256 positions within that red 16x16 square. (nybble 7=0, nybble 9=1) The green 1x1 square can take any of the 256 positions within that green 16x16 square. (nybble 7=1, nybble 9=1) The blue 1x1 square can take any of the 256 positions within that blue 16x16 square. Here the 4 mini-squares have both nybbles 8 and 10 at 0, of course changing the nybble 8 will place those squares higher and the 10 will place them farther on the right. That's it for this sprite. Now onto the sprite 84 (the more complicated one). x=nybble 6 y=nybble 7 z=nybble 10\2 (yes \2 and not /2) In-depth analysis : The active range (highlighted here in red and green) is always a zone whose equivalent area can be calculated by the following formula; 2y*(x-z). Exceptions : _if x=0 then the active range will have an "infinite" width; _if y=0 then the active range will have an "infinite" height; _if both are 0 then the active range will have both an "infinite" width and height; _and if somehow z>=x with x!=0, then congratulations you got yourself a useless sprite since the resulting zone will be 0 tile² and thus the zoom will never activate. Notice that the only case where you can manipulate the zoom while being under the sprite is when the y setting is 0, otherwise the zone is ALWAYS above the horizontal axis. Red zone will always be left to the vertical axis. Green zone will always be right to the vertical axis (it's actually no more no less than the flipped image of the red zone). Entering the red zone will trigger the zoom left (nybbles 8-9). Entering the green zone will trigger the zoom right (nybbles 10-11). Red and green zones can't overlap (due to their symmetrical natures) and at most they may have 1 common boundary, and that's if z=0 (the rightmost part of the red zone with the leftmost part of the green zone). When entering an area, if a sprite 84 is present, it will be in a dormant state so to activate it you MUST enter in the red zone. The zoom will only works if Mario is in the zone AND if he is close enough to the sprite, even if the range is set to have an "infinite" width and/or height. Zoom (left and right) can be any value between 0 and 255, doesn't matter since a modulo 32 is applied to the result afterwards (well it technically still matters for the zoom right due to that z-value at nybble 10). By default the camera's zoom-setting is always 16, regardless of the presence or not of the sprite 84. The zoom value is actually the width (in tiles) rendered by the camera. Width:height ratio is always 4:3 so it means that to keep the best results it is recommended (though not mandatory) to fill both zoom values with numbers divisible by 4. As said earlier you can put any value between 0 and 255 inclusive but bear in mind that there are 3 limiations outside of the modulo 32: _if zoom%32<8 then the result is rounded up to 8; _if zoom%32>24 then the result is rounded down to 24; _and if zoom%32=0 then the camera will use the last non-zero zoom-setting. I though it would be smarter to make a topic rather than explain all of this in the sprite database since this sprite is definitely a pain in the ass if you don't know how it works, and I myself think having a visual of that sprite would be beneficial for everyone. With all this new information, we can now achieve somewhat cool zooming-out effects like in NSMBU's Tilted Tunnel. And done. I hope that the data came as transparent as possible, let me know if something didn't came accross as clear. |
|
|
Posted on 11-06-14, 08:27 pm in Rips from Newer NSMB Titles
|
|
Death by cuteness
Karma: 6564 Posts: 152/598 Since: 05-01-13 |
Hmm… might as well upload my rips as well
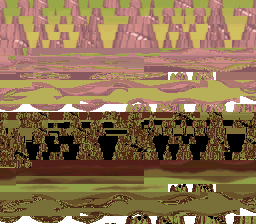
 They contain some customizations, but I don't think that's enough to warrant another thread. NSMBWii End-of-level Castle (normal and secret) 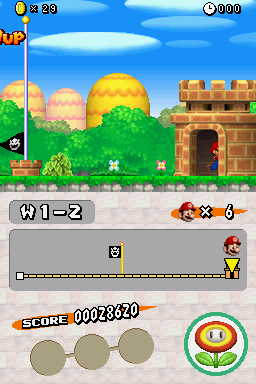 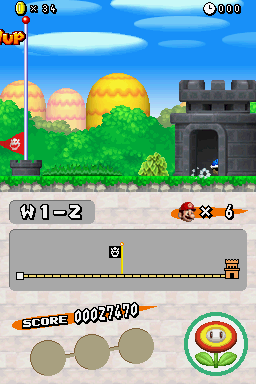 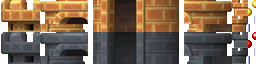 SubNohara.rar Rar file contains the .nmt, 4 files (goal_flag) to put in the enemy folder and 21 files (I_toride) to put in the polygon_unit folder. NSMBWii Desert with munchers 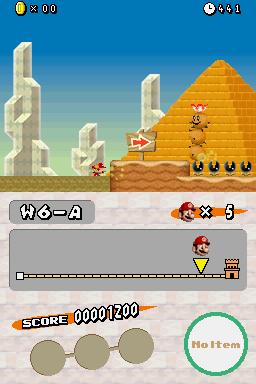 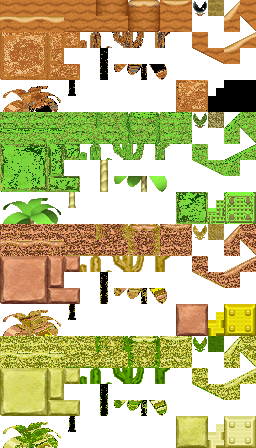 Desert.rar Rar file contains the .nmt + 4 files to put in the polygon_unit folder. NSMBWii Underground with light bulbs Light bulbs switch on and off on their own. 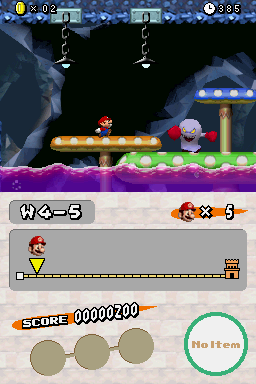  Underground.nmt NSMBWii Beta Snow 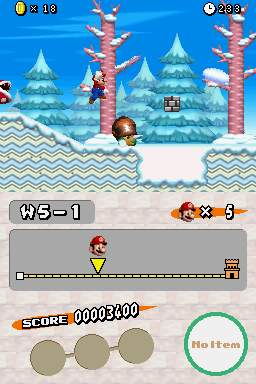  Beta snow.rar Rar file contains the .nmt + 3 files to put in the enemy folder. NSMBWii Mountain Double randomization 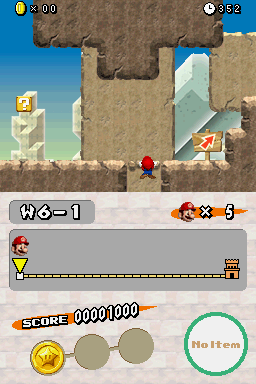 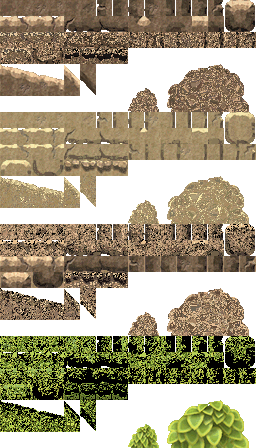 Mountain.nmt Jungle Mountain NSMBWii-style Double randomization This one actually doesn't exist in NSMBWii, it's merely a mock-up of the Mountain tileset taken from NSMBWii File Depot. 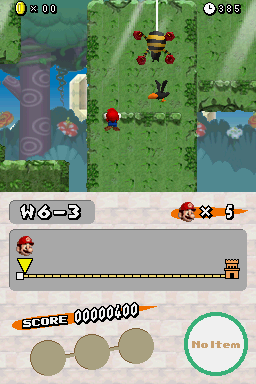 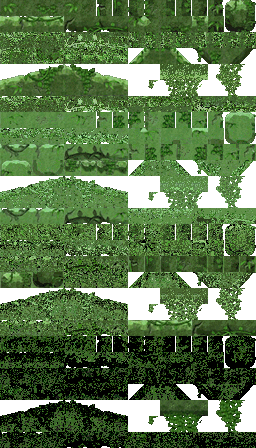 Jungle mountain.nmt |
|
|
Posted on 11-24-14, 09:04 am in Mute boss music : explanation (rev. 1 by
|
|
Death by cuteness
Karma: 6564 Posts: 161/598 Since: 05-01-13 |
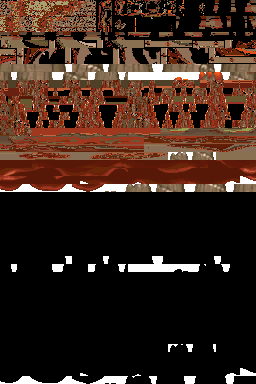
Posted by MarioFanatic64 I think there's just a weird problem with modified ROMs and boss music. I haven't even touched the boss rooms in Hack #4 and half of them are still left without music, including the final boss. The source of the problem lies in the bottom background who is loaded when you access the level (be it at the beginning or at the checkpoint). Here is the list of the 12 compatible bottom background's slots who allow you to load the bosses themes: 1
39
41
45
47
49
55
58
61
62
63
65 The boss theme will play if the first loaded area has a compatible bottom background. The first loaded area is the area where Mario/Luigi spawns when the level is loaded, so either area 1 or the area where the checkpoint is located. The check is done on the bottom background's tileset only. There's no restriction for the bottom background's palette. |
|
|
Posted on 04-26-15, 03:36 pm in Misc. patches thread (rev. 1 by
|
||||||||||||||||||||||||||||||||||||||||||||||||||||||||||||||||||||||||||||||||||||||||||||||||||||||||||||||||||||||||||||||||||||||||||||||||||||||||||||||||||||||||||||||||||||||||||||||||||||||||||||||||||||||||||||||||||||||||||||||||||||||||||||||||||||||||||||||||||||||||||||||||||||||||||||||||||||||||||||||||||||||||||||||||||||||||||||||||||||||||
|
Death by cuteness
Karma: 6564 Posts: 308/598 Since: 05-01-13 |
I present you the damage table for the Bosses.
It was skawo's idea, and already did begin the work with Bowser Jr. Also the table have some empty cells because trying to use rowspan on more than 1 row break the table on this site.
Note 1: Putting damage=00 for any given weapon (fireball / stomp / mini-pound / blue shell / ground-pound) makes the boss immune to that weapon. Note 2: Mini-Pound often uses the same variable than Stomp. Note 3: During Bowser's battles, if Blue Shell counter increment is set to 0, every time Mario or Luigi slams into Bowser with the Blue Shell the score will go up by 32768 points (or 0×8000 in hex). Note 4: If Blue Shell counter is negative, the score can glitch! Note 5: Against Petey Piranha, if the damage dealt by a weapon is less than Max HP/3, the remaining health after the hit is more than Max HP×2/3, and the score is supposed to increase, then the score will glitch! Tips: Here are each value for Monty Tank in hex: _1536 => 0600 _2048 => 0800 _4096 => 1000 _8192 => 2000 _12288 => 3000 Note how the second byte is always 00. Wouldn't it be easier if we only had to read to left byte? Here are the rewritten values, from there you can modify them more easily: 06 1C => already good 02 1B => 08 1C 01 1A => 10 1C 02 1A => 20 1C |
|
|
Posted on 06-23-16, 06:11 am in Rips from Newer NSMB Titles (rev. 4 by
|
|
Death by cuteness
Karma: 6564 Posts: 421/598 Since: 05-01-13 |
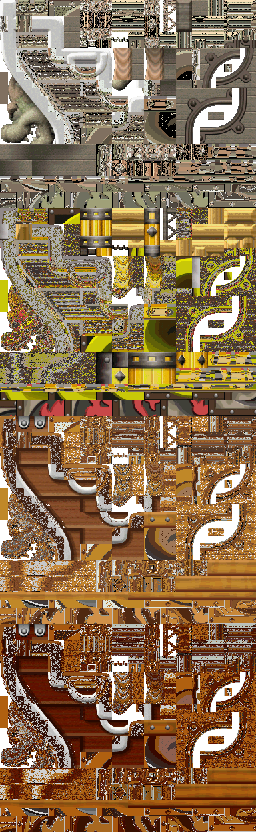   Airship.nmt Airship top BG.nmb Airship bottom BG.nmb This Airship tileset allows you to be more creative with the level design due to the fact that the tileset is 256×208 pixels instead of the usual 256×112 pixels. But this come with a restriction, to use this tileset to its full potential, you will need to use the 2 backgrounds that go hand to hand with this tileset. Keep in mind that if you want to use this tileset, you won't be able to use the Sub nohara tileset with it, but since airship levels are usually associated with Bowser Jr., this shouldn't be an issue. Also note that if you want to change the BG animation, refer to this thread: http://nsmbhd.net/thread/3283-animate-any-background-tutorial/ Credits are appreciated but not required. |
|
|
Posted on 07-03-16, 08:20 pm in asm Double SubNohara size (rev. 7 by
|
|
Death by cuteness
Karma: 6564 Posts: 445/598 Since: 05-01-13 |
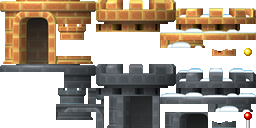
What this ASM hack does is that it doubles the effective area for SubNohara. On top of that Snowy Castles and Broken Flagpoles are fully implemented. Also contains the NSMBWii castles and NSMBWii flagpoles. Enjoy  Download: SubNohara V2 The archive contain the enemy folder, the polygon_unit folder, the .nmt for SubNohara and the ASM hack (.s) for this to work. For both folders, only the modified files are present, to import them with NSMB Editor: _click the corresponding folder and click Replace, this will replace only the files named exactly like the original ones. Even though the .s file is already present in the zip archive, here is the ASM hack: SubNohara textures and broken flagpole relocation: @Write BG 8192 bytes later in the VRAM
repl_020BD048_ov_00:
ADD R1, R3, #0xB000
BX LR
@Write FG 8192 bytes later in the VRAM
repl_020BD094_ov_00:
ADD R1, R3, #0x6000
BX LR
@Begin lecture of BG and FG nsc 2 rows later
repl_020BCBB4_ov_00:
MOV R5, #0
MOV R7, #0x400
SUB R7, R7, #1
LDRH R4, [R11]
AND R6, R4, R7
CMP R6, #0x100 @Take into account Tile-Share
ADDCS R4, R4, #0x80
STRH R4, [R11], #2
ADD R5, R5, #1
CMP R5, #0x2000
SUBCC PC, PC, #0x24
LDR R4, =0x20CAD5C
LDR R4, [R4]
CMP R4, #0
ADDEQ PC, PC, #0x18
LDR R5, [R4, #-0xC]
ADD R5, R4, R5
LDRH R6, [R4]
ADD R6, R6, #0x80
STRH R6, [R4], #2
CMP R4, R5
SUBCC PC, PC, #0x18
ADD SP, SP, #0x24
LDMFD SP!, {R4-R11, PC}
@TEN animations for some tilesets
repl_020B699C_ov_00:
repl_020B69BC_ov_00:
repl_020B6E98_ov_00:
ADD R1, R1, #0x2000
MOV R2, #0x180
BX LR
repl_020B6DB8_ov_00:
ADD R1, R1, #0x2000
MOV R2, #0x400
BX LR
repl_020B710C_ov_00:
repl_020B712C_ov_00:
repl_020B714C_ov_00:
repl_020B7168_ov_00:
repl_020B720C_ov_00:
repl_020B722C_ov_00:
repl_020B724C_ov_00:
repl_020B731C_ov_00:
repl_020B733C_ov_00:
repl_020B735C_ov_00:
repl_020B737C_ov_00:
repl_020B739C_ov_00:
repl_020B73B8_ov_00:
repl_020B744C_ov_00:
repl_020B746C_ov_00:
repl_020B748C_ov_00:
repl_020B751C_ov_00:
repl_020B753C_ov_00:
repl_020B755C_ov_00:
repl_020B757C_ov_00:
repl_020B7598_ov_00:
repl_020B762C_ov_00:
repl_020B764C_ov_00:
repl_020B766C_ov_00:
repl_020B768C_ov_00:
repl_020B76A8_ov_00:
repl_020B77E0_ov_00:
repl_020B7804_ov_00:
repl_020B7828_ov_00:
repl_020B78C4_ov_00:
repl_020B78E4_ov_00:
repl_020B7904_ov_00:
repl_020B7920_ov_00:
ADD R1, R1, #0x2000
MOV R2, #0x100
BX LR
@Change which Tile Number yields which texture for SubNohara
nsub_020B00EC_ov_00:
CMP R1, #0x540
ADDCC PC, PC, #0x54
LDR R2, =0x545
CMP R1, R2
BHI 0x20B0184
SUB R3, R1, #0x540
MOV R0, #0x65
CMP R3, #1
MOVEQ R0, #0x68
CMP R3, #2
MOVEQ R0, #0x62
CMP R3, #3
MOVEQ R0, #0x67
CMP R3, #4
MOVEQ R0, #0x6A
CMP R3, #5
MOVEQ R0, #0x64
MOV R3, R0
LDR R0, =0x20CAD44
LDR R2, [R0]
ADD SP, SP, #4
STRB R3, [R2, LR]
MOV R0, R1
LDMFD SP!, {R4-R5, PC}
CMP R1, #0x530
ADDCC PC, PC, #0x2C
LDR R2, =0x539
CMP R1, R2
BHI 0x20B0184
SUB R3, R1, #0x530
ADD R3, R3, #0x86
AND R3, R3, #0xFF
LDR R0, =0x20CAD44
LDR R2, [R0]
ADD SP, SP, #4
STRB R3, [R2, LR]
MOV R0, R1
LDMFD SP!, {R4-R5, PC}
CMP R1, #0x520
BCC 0x20B0184
LDR R2, =0x529
CMP R1, R2
BHI 0x20B0184
SUB R3, R1, #0x520
ADD R3, R3, #0x7A
AND R3, R3, #0xFF
LDR R0, =0x20CAD44
LDR R2, [R0]
ADD SP, SP, #4
STRB R3, [R2, LR]
MOV R0, R1
LDMFD SP!, {R4-R5, PC}
@Broken flagpole dynamic palette
repl_02130214_ov_0C:
LDRH R0, [R4, #0xC]
CMP R0, #0x24
ADDNE PC, PC, #0x24
LDR R0, =0x20CAD30
LDR R0, [R0]
LDR R1, =0x635B635A
LDR R2, =0x635D635C
LDRB R3, [R4, #0xB]
ANDS R3, R3, #0x10
LDRNE R1, =0x737B737A
LDRNE R2, =0x737D737C
STR R1, [R0, #0x174]
STR R2, [R0, #0x17C]
LDR R1, [R4, #0x64]
BX LR Pics: 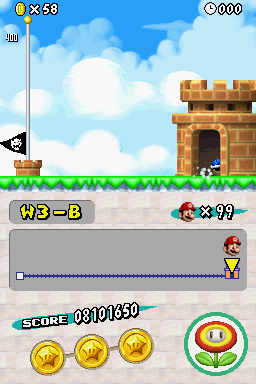 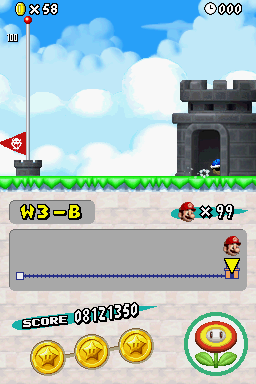 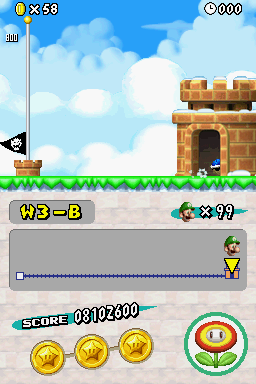 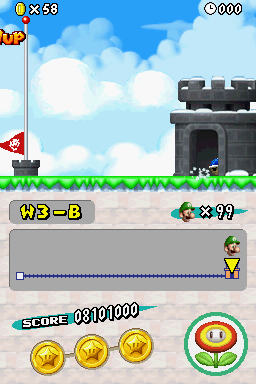 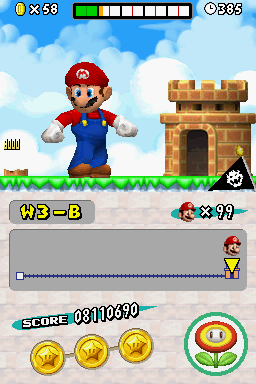  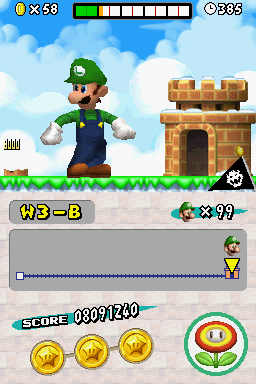 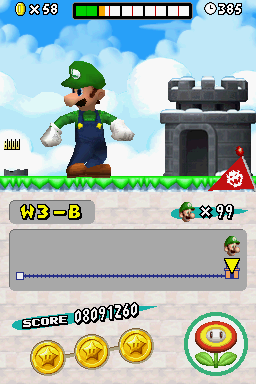
|
- NSMBHD
- Member list
- +1'd posts