Pages: 1
| Wesley |
Posted on 05-25-16, 01:44 pm (rev. 3 by ImageBot on 11-21-16, 03:20 am)
|
|
Inactive, don't bother
Karma: 1285 Posts: 369/377 Since: 10-07-12 |
Hello everyone, Some people asked me how to create a Star Coin selection screen like this: 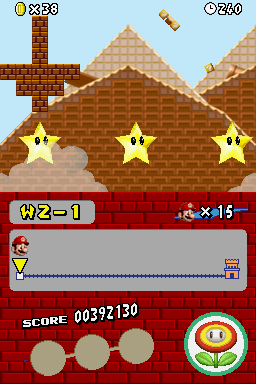 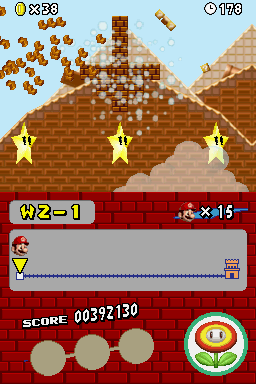 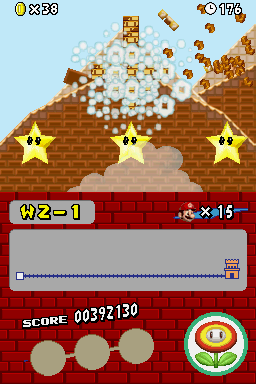 So I am going to show you step by step how to create your own. Let's get into it. Step 1. At first you create a view of 272x192. This is the size of the height and width of the screen. 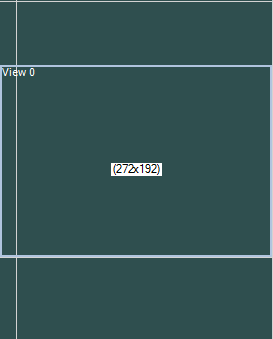 Step 2. Create a small box of 5x5 and put it right under the view at the the centre. 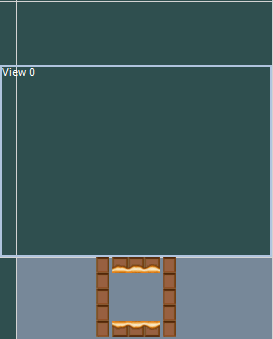 Step 3. Create 3 arrows made out of Tile God sprites (Tile creator/destroyer). Each arrow has it's own sprite data. The sprite data for each arrow is listed down below. Tile God arrow 1 sprite data: 01 00 00 00 11 00 Tile God arrow 2 sprite data: 02 00 00 00 11 00 Tile God arrow 3 sprite data: 03 00 00 00 11 00  Step 4. Put down 3 switches inside the box upside down, this is the area where you controll Mario/Luigi and where you decide to which area they warp to. The sprite data of each Switch is listed down below. Switch 1 Sprite data: 00 2F 00 10 02 01 Switch 2 Sprite data: 00 30 00 10 02 01 Switch 3 Sprite data: 00 31 00 10 02 01 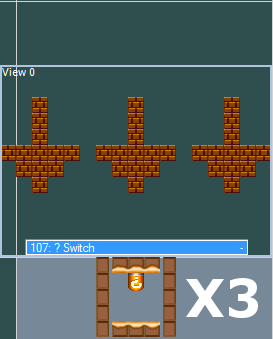 Step 5. Put down 3 warp sprites. The sprite data for each Warp sprite is listed down below, Warp zone 1 sprite data: 2F 00 00 08 00 11 Warp zone 2 sprite data: 30 00 00 08 00 12 Warp zone 3 sprite data: 31 00 00 08 00 13 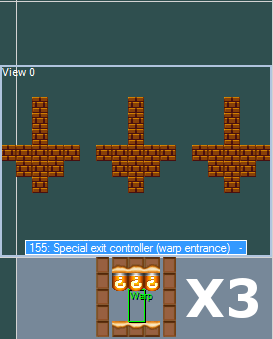 Step 6. Create 3 Zones. Each Zone has a size of 16x48. Put these zones over the Warp sprites. 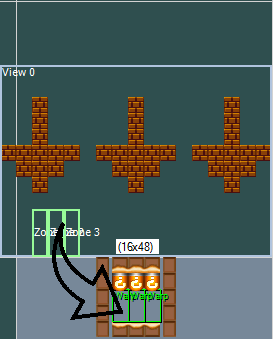 Step 7. Put down 3 times the Event Controller-If uses zones sprite above the view wherever suitable. The sprite data for each Event Controller is listen down below. Event Controller 1 - connected to zone 1 sprite data: 00 01 01 00 00 20 Event Controller 2 - connected to zone 2 sprite data: 00 02 02 00 00 20 Event Controller 3 - connected to zone 3 sprite data: 00 03 03 00 00 20 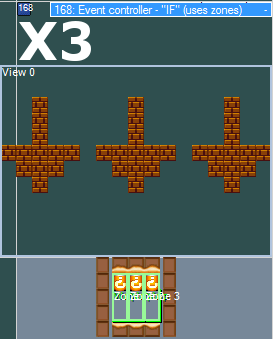 Step 8. Select the player enterance and put it right into the centre of the 5x5 box. 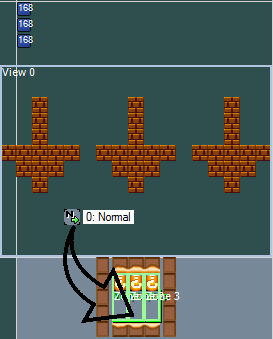 Step 9. Put down 3 Star Coin sprites 1 tile under the arrows. The sprite data of the Star Coins has been listed down below. Star Coin 1 Sprite data: 00 00 00 00 00 10 Star Coin 2 Sprite data: 00 00 00 00 01 10 Star Coin 2 Sprite data: 00 00 00 00 02 10 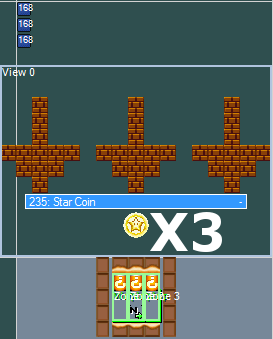 Step 10. When finished it should look like this: 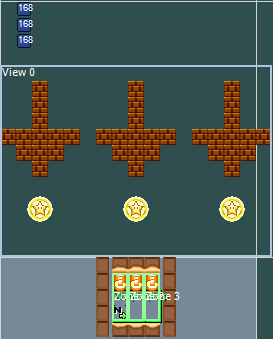 __________________________________________________________________________________________________________________________________ I hope that this tutorial helped you people a lot. If you got any questions about this subject feel free and ask me. ~Wesley New Super Holiday Bros - Mario Kart GTA San Andreas |
|
|
Posted on 05-26-16, 05:09 pm (rev. 4 by ImageBot on 11-21-16, 03:20 am)
|
|
a
 Karma: 1589 Posts: 1154/1290 Since: 02-12-13 |
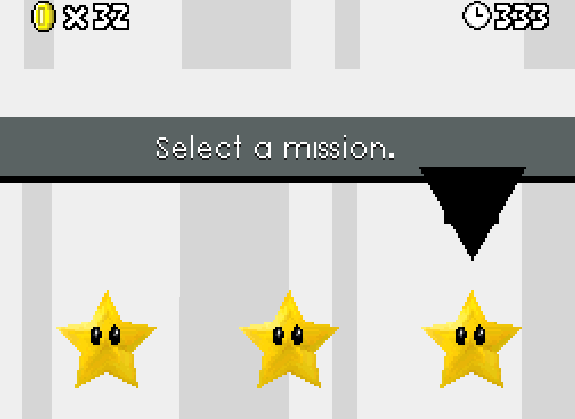
Can anyone guess how I did it? It's pretty simple actually lol. (no particles, smooth animation, works) (Star model is by Wesley, gave it to me for testing this thing out only) |
| Sherry_ |
Posted on 05-26-16, 05:20 pm
|
|
Karma: 1430 Posts: 235/355 Since: 05-26-15 |
Rotating Triangle Lift sprite maybe?

|
|
|
Posted on 05-26-16, 05:30 pm
|
|
a
Karma: 1589 Posts: 1155/1290 Since: 02-12-13 |
Ah, you got it. Good job lol. It's a background which says Select the Mission which I'll reposition slightly, and the arrow is a compeltely black textured Rotating Triangle Lift.
|
| Sherry_ |
Posted on 05-26-16, 05:56 pm (rev. 1 by Sherry_ on 05-26-16, 05:56 pm)
|
|
Karma: 1430 Posts: 236/355 Since: 05-26-15 |


Pages: 1